In a world where dietary choices are as diverse as the flavors on our plates, gluten-free flatbread emerges as a versatile, delightful option that bridges tradition and modern needs. Whether you’re navigating a gluten intolerance or simply exploring new culinary horizons, crafting your own gluten-free flatbread opens the door to a world of texture, taste, and creativity. This simple guide will walk you through the essentials, transforming basic ingredients into warm, satisfying flatbreads that complement any meal-no gluten required.
Crafting delicious gluten-free flatbread relies on selecting the right flours and mastering techniques that transform simple ingredients into tender, aromatic, and crispy flatbreads. by embracing the nuances of gluten-free baking, you can achieve a soft, flexible dough that’s easy to work with and cooks to golden perfection every time.
Prep and Cook Time
- Preparation: 15 minutes
- Resting time: 30 minutes
- Cooking: 10 minutes
- Total: 55 minutes
yield
Makes 6 medium-sized flatbreads (approximately 8 inches each)
Difficulty Level
Easy to Medium – great for beginners adapting to gluten-free baking
Ingredients
- 1 cup brown rice flour, finely ground
- 1/2 cup tapioca starch (for elasticity and chew)
- 1/2 cup sorghum flour (adds mild sweetness and structure)
- 1 teaspoon xanthan gum (optional but recommended for binding)
- 1 teaspoon baking powder
- 1/2 teaspoon sea salt
- 1 tablespoon olive oil (plus more for cooking)
- 3/4 cup warm water, adjust as needed
- 1 teaspoon garlic powder (optional for flavor enhancement)
- 1 teaspoon dried oregano or fresh herbs (optional)
Instructions
- Combine the dry flours: In a large bowl, whisk together brown rice flour, tapioca starch, sorghum flour, xanthan gum, baking powder, and sea salt. This blend balances absorbency and texture, ensuring tender flatbreads.
- Add aromatics: Stir in the garlic powder and oregano to infuse subtle, inviting flavor that complements many savory dishes.
- Mix wet ingredients: Make a well in the center and pour in the warm water and olive oil. Gradually incorporate the dry ingredients, using a wooden spoon or your hands to form a soft, slightly sticky dough.
- Knead gently: Transfer the dough to a lightly floured surface (using one of your gluten-free flours) and knead for about 2 minutes until smooth and pliable. Avoid overworking to keep the dough tender.
- Rest: Cover with a damp towel and let the dough rest for 30 minutes. This rest period hydrates the flours fully and allows the dough to become more elastic, making rolling easier.
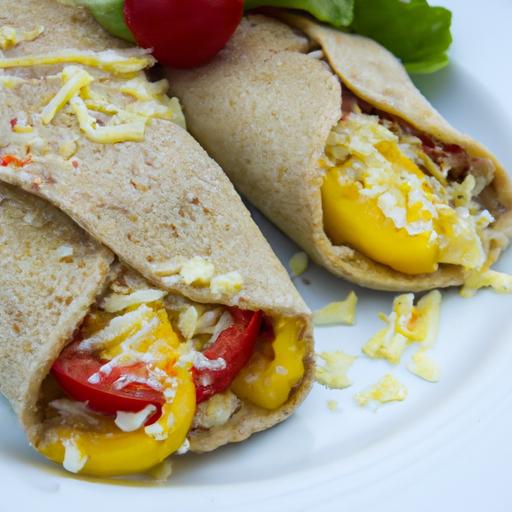
- Divide and roll: Portion the dough into 6 equal balls. Using a rolling pin on a lightly floured surface, roll each ball into an 8-inch circle, approximately 1/8 inch thick. Don’t worry if the edges are slightly uneven; rustic shapes add charm.
- Preheat the skillet: Heat a heavy-bottomed cast iron or non-stick skillet over medium-high heat.Brush lightly with olive oil to prevent sticking and encourage crispiness.
- Cook flatbreads: Place the first flatbread in the skillet and cook until bubbles form and the bottom is golden brown, about 2 minutes. Flip and cook the other side for another 2 minutes. Adjust heat as needed to avoid burning; you want crispy exteriors and soft centers.
- keep warm: Stack cooked flatbreads on a plate and cover with a clean kitchen towel to retain softness while you finish the batch.
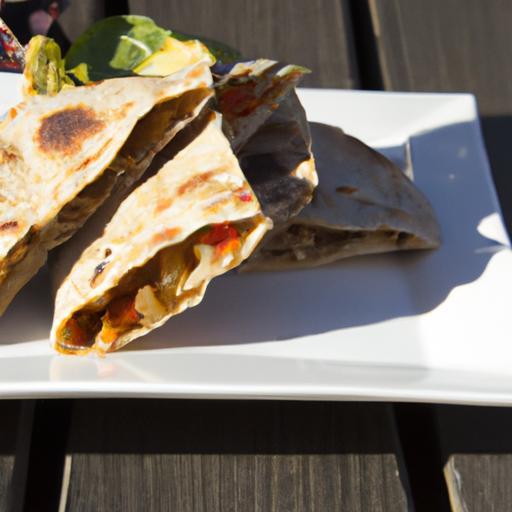
- Serve: Enjoy warm for the best flavor and texture.
Tips for Success with Gluten-Free Flours and Dough
- Choosing flours: Brown rice flour creates a neutral base,tapioca starch adds elasticity similar to gluten,and sorghum flour brings a mild sweetness and structure. avoid relying on just one flour to prevent crumbly texture.
- Hydration: Gluten-free flours absorb water differently; keep extra warm water on hand to adjust dough consistency-aim for soft but not sticky.
- Rest matters: Allowing the dough to rest improves hydration and dough consistency, making it easier to roll out flatbreads that won’t crack.
- cooking temperature: Moderate heat prevents burning while ensuring evenly cooked, crispy flatbreads.
- Flavor enhancements: Including subtle herbs and garlic powder elevates your flatbread from bland to irresistible, perfect for pairing with dips or toppings.
Serving Suggestions
Serve these golden gluten-free flatbreads with Mediterranean dishes like hummus, baba ganoush, or roasted vegetables. Garnish with fresh chopped parsley or a drizzle of good-quality olive oil and a sprinkle of flaky sea salt for an extra aromatic touch. They also make a fantastic base for gluten-free pizzas or wraps.

| Nutritional Info (per flatbread) | Amount |
|---|---|
| Calories | 140 |
| Protein | 3g |
| Carbohydrates | 28g |
| Fat | 3.5g |
For further inspiration on gluten-free baking techniques, visit Gluten-Free Girl. Also,explore our related gluten-free baking tips to expand your culinary repertoire.
Q&A
Q&A: Crafting Delicious Gluten-Free Flatbread – A Simple Guide
Q1: What makes gluten-free flatbread different from customary flatbread?
A1: Gluten-free flatbread is crafted without wheat or gluten-containing grains, using option flours like rice, almond, or chickpea flour. This absence of gluten alters the dough’s elasticity and texture, calling for specific techniques to achieve that perfect chewy yet tender bite.
Q2: Which flours work best for gluten-free flatbread?
A2: Great options include rice flour, tapioca starch, sorghum flour, chickpea flour, and almond flour. Often, a blend of these flours yields the best results, balancing flavor, texture, and flexibility to mimic the qualities of traditional flatbread.
Q3: How can I ensure my gluten-free flatbread doesn’t turn out dry or crumbly?
A3: Hydration is key. Gluten-free dough typically needs a bit more moisture. Incorporating ingredients like yogurt, olive oil, or even a touch of xanthan gum can improve softness and binding.Also, avoid overbaking – keep an eye on the flatbread’s color and texture as it cooks.
Q4: Is yeast necessary for gluten-free flatbread?
A4: Not always. Many gluten-free flatbreads are unleavened and rely on baking powder or no leavening agent at all. However, using yeast can add a lovely depth of flavor and slight rise, but it requires longer resting times and some experimentation.
Q5: What cooking methods work best for gluten-free flatbread?
A5: Stovetop cooking on a hot skillet or griddle is popular, providing quick, even heat and a satisfying char. Baking on a preheated stone or sheet in the oven can work well to, especially for thinner varieties. Some even grill their flatbreads for a smoky twist.Q6: Can gluten-free flatbread be flavored or styled differently?
A6: Absolutely! You can infuse the dough with herbs like rosemary or thyme, add spices such as cumin or garlic powder, or top with seeds before cooking. Flatbreads can be made thick and fluffy or thin and crispy – the possibilities are as creative as your taste buds.
Q7: How shoudl gluten-free flatbread be stored?
A7: To maintain freshness, let the flatbread cool completely, then store in an airtight container or zip-top bag at room temperature for up to 2 days. For longer storage, freeze individual pieces separated by parchment paper and reheat gently when needed.
Q8: Any tips for beginners tackling gluten-free flatbread for the first time?
A8: Start simple with a basic flour blend and minimal ingredients. Measure accurately, be patient with dough consistency adjustments, and don’t be afraid to experiment. Keep notes on what works best in your kitchen, and enjoy the rewarding process of creating a delicious gluten-free staple.
Closing remarks
Whether you’re navigating dietary needs or simply exploring new flavors, crafting your own gluten-free flatbread opens a world of tasty possibilities. With just a handful of ingredients and a bit of patience, you can create bread that’s both satisfying and versatile-perfect for dipping, topping, or enjoying on its own. Embrace the simplicity of this guide, experiment with your favorite additions, and let your kitchen become a haven for wholesome, delicious flatbreads made just the way you like them.