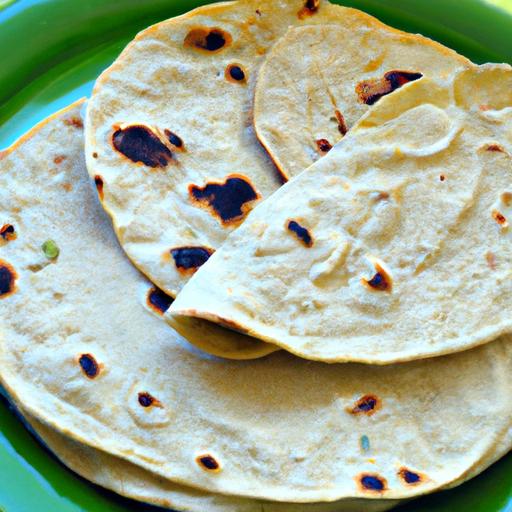
Ther’s something deeply satisfying about biting into a warm, freshly made flour tortilla-soft, tender, and subtly fragrant. While store-bought options offer convenience, they often miss teh subtle nuances and comforting warmth of a homemade version. Crafting perfect homemade flour tortillas is an art that combines simple ingredients with time-honored techniques,resulting in a truly authentic taste experience. In this article, we’ll explore how to create these delicate flatbreads from scratch, guiding you through every step to unlock the secrets of simplicity and tradition in your own kitchen.
Crafting perfect homemade flour tortillas starts with selecting the finest ingredients that guarantee soft, supple, and flavorful results every time. The foundation lies in choosing high-quality all-purpose flour that is finely milled and fresh. Fresh baking powder and salt balance the flavor, while the addition of lard or vegetable shortening contributes to the signature tenderness and pliability. Many traditional recipes favor lard for its flavor and texture, but vegetable shortening or even unsalted butter can be excellent substitutes for a milder taste and dairy inclusion.
Prep and Cook Time
- Prep Time: 15 minutes
- Resting Time: 30 minutes
- Cook Time: 15 minutes
Yield
Makes approximately 12 medium-sized tortillas (8-inch diameter)
Difficulty level
Easy to Medium
Ingredients
- 2 cups all-purpose flour,sifted
- 1/2 teaspoon baking powder
- 1 teaspoon fine sea salt
- 3 tablespoons lard (or vegetable shortening or unsalted butter,softened)
- 3/4 cup warm water (about 110°F / 43°C)
Instructions
- Mix Dry Ingredients: In a large bowl,combine the sifted flour,baking powder,and salt. Whisk these together to ensure even distribution of the leavening agent and salt.
- Incorporate the Fat: Using your fingertips or a pastry cutter, blend the lard into the flour mixture until it resembles coarse crumbs. This step is crucial for achieving tender tortillas.
- Add Warm Water Slowly: Pour in the warm water gradually, stirring with a wooden spoon or your hands until the dough begins to come together.
- Knead the Dough: Transfer the dough to a lightly floured surface and knead for 8-10 minutes until it is smooth,elastic,and slightly tacky but not sticky.Proper kneading develops gluten, essential for the perfect tortilla texture.
- Rest the Dough: place the dough back in the bowl, cover with a clean kitchen towel or plastic wrap, and let it rest for at least 30 minutes. This resting period hydrates the flour and relaxes gluten, making rolling easier.
- divide and Shape: After resting, divide the dough into 12 equal balls. Roll each ball between your palms to smooth and shape.
- Roll Out: Using a rolling pin on a lightly floured surface, roll each ball into a thin, 8-inch circle. Aim for even thickness, as uneven spots can cause puffing or tearing during cooking.
- Cook Tortillas: Heat a cast-iron skillet or heavy-bottomed pan over medium-high heat. Cook each tortilla for 30-45 seconds on the first side, watching for bubbles, then flip and cook for another 30 seconds until golden spots appear. Flip one more time if needed,just to finish cooking. Avoid pressing down; let the tortilla puff naturally.
- Keep Warm: Stack cooked tortillas on a clean kitchen towel and wrap them to retain softness and warmth until serving.
Chef’s Notes
- Substitutions: For gluten-free options, blends with rice flour and tapioca starch can work but will yield a different texture.
- Flavor Additions: Infuse your warm water with a pinch of garlic powder or fresh herbs to add subtle savory notes.
- Troubleshooting: If your tortillas crack at the edges, the dough likely needs more moisture or resting time. If too sticky, dust with a little extra flour during rolling, but avoid over-flouring.
- Make-Ahead: Dough can be refrigerated wrapped tightly for up to 24 hours; bring to room temperature before rolling.
Serving Suggestions
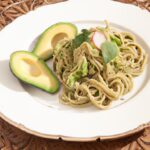
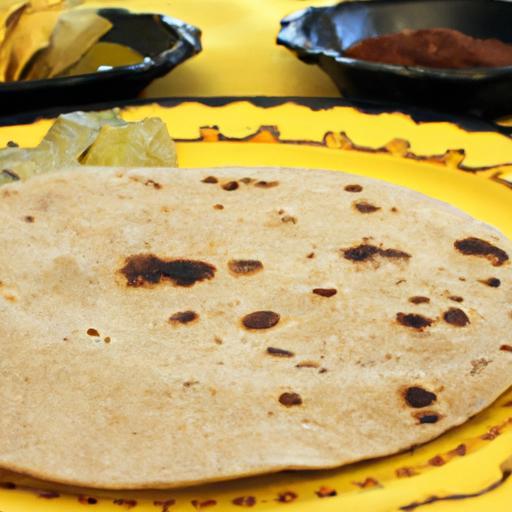
Serve your freshly made tortillas with classic fillings such as grilled carne asada, smoky chipotle chicken, or roasted vegetables. Garnish with fresh cilantro, diced onions, a squeeze of lime, and your favorite salsa. For a breakfast twist,use them as wraps for scrambled eggs,avocado,and salsa verde.Rolled warm with a dab of butter,these tortillas shine just as well alongside beans and queso fresco.

| Nutrient | Per Tortilla (1/12th) |
|---|---|
| Calories | 110 kcal |
| Protein | 3 g |
| Carbohydrates | 18 g |
| Fat | 3 g |
Additional Resources
Explore our in-depth guide on homemade tortilla variations to expand your culinary repertoire. For ancient context and cultural gratitude,visit The Food Timeline – Mexican Cuisine, a complete external resource on traditional Mexican staples.
Q&A
Q&A: Crafting Perfect Homemade Flour Tortillas – Simple & Authentic
Q1: Why make homemade flour tortillas instead of buying store-bought ones?
A1: Homemade flour tortillas bring a freshness and warmth that store-bought versions often lack. They’re free of preservatives, fully customizable in thickness and size, and offer a satisfying texture that’s soft yet slightly chewy. Plus, the process of making them at home connects you to a rich tradition of authentic Mexican cooking.Q2: What are the essential ingredients for authentic flour tortillas?
A2: The classic ingredients are simple: all-purpose flour, water, salt, and fat-traditionally lard or vegetable shortening. Some recipes include a pinch of baking powder for slight puffiness, but the magic lies in balancing these basic components to achieve that tender, pliable tortilla.
Q3: Can I substitute lard with a plant-based fat?
A3: Absolutely. Vegetable shortening or even olive oil can be used for a vegetarian or vegan choice. While lard imparts traditional flavor and a supple texture, plant-based oils can yield tasty results with a slightly different mouthfeel.
Q4: How do I know when the dough is ready?
A4: The dough should be smooth and elastic-neither too sticky nor dry. After kneading for about 5-8 minutes, it should hold together well and spring back slightly when pressed. Letting it rest covered for at least 30 minutes helps relax the gluten, making rolling easier.
Q5: What’s the secret to rolling out tortillas evenly?
A5: Work on a lightly floured surface,using a rolling pin with gentle,even pressure. Rotate the dough ball frequently as you roll, aiming for a thin, consistent circle about 6-8 inches in diameter. Avoid over-flouring, as excess flour can dry out the tortilla.
Q6: How do I cook the tortillas properly?
A6: Heat a dry skillet or cast-iron pan over medium-high heat until hot. Place the rolled-out dough onto the pan and cook for about 30-45 seconds on the first side until light brown spots appear. Flip and cook the other side for another 30 seconds. The tortilla should puff slightly-this indicates steam forming inside and a perfectly cooked wrap.
Q7: Can I store homemade flour tortillas, and how?
A7: Yes! Once cooled, stack them with a paper towel in between and wrap tightly in foil or store in an airtight container. Refrigerate for up to a week or freeze for longer storage. To reheat, warm them on a hot skillet or wrap in a damp cloth and microwave briefly.
Q8: Any tips for adding flavor or variations to the basic recipe?
A8: Feel free to experiment by adding herbs like cilantro or spices such as cumin to the dough for a subtle twist. Some cooks mix in a bit of whole wheat flour for a nuttier flavor. The beauty of homemade tortillas is that you can easily tailor them to your taste!
Q9: What dishes pair best with homemade flour tortillas?
A9: These tortillas are incredibly versatile-they shine as the perfect base for tacos, burritos, quesadillas, and wraps. They also complement grilled meats, beans, and roasted vegetables beautifully or can be enjoyed simply with butter and a sprinkle of salt.
Q10: Is making flour tortillas a difficult skill to master?
A10: Not at all! While it takes a little practice to perfect rolling and cooking technique, flour tortillas are a forgiving recipe. Each attempt improves your feel for the dough and heat, making the process both satisfying and rewarding. With simple ingredients and a few tried-and-true steps, delicious homemade tortillas are well within your reach.
The Conclusion
As the last tortilla warms gently in your pan, you’ll find that crafting these simple, authentic treats at home is as rewarding as it is delicious. Beyond just flour and water, it’s the care and rhythm of the process that transform humble ingredients into soft, warm circles of comfort. Whether wrapped around your favorite fillings or served alongside a vibrant meal, homemade flour tortillas invite you to slow down, savor tradition, and celebrate the art of everyday cooking. So roll up your sleeves, embrace the simplicity, and let each tortilla tell its story-fresh, perfect, and made by your own hands.