There’s something truly satisfying about crafting your own meal from scratch, especially when it involves a beloved favorite like pizza. Imagine gathering all your favorite ingredients, rolling up your sleeves, and assembling a personalized pizza that’s as fun to make as it is indeed to eat. Creating your own DIY pizza lunch kit at home turns an ordinary midday meal into a creative, hands-on experience perfect for family lunches, casual gatherings, or simply indulging your culinary curiosity. In this article, we’ll guide you through assembling the perfect kit – from choosing the dough and sauce to selecting toppings – so you can enjoy a delicious, customizable pizza adventure right in your own kitchen.
Create Your Own Fun DIY Pizza Lunch Kit at Home begins with unlocking the secrets of fresh, vibrant ingredients that elevate every bite. The magic of a flawless pizza lies not only in the dough but in the harmony between crisp bases,savory sauces,and toppings bursting with color and flavor. Whether you crave classic simplicity or daring combinations, mastering each element ensures your DIY lunch kit is always a hit.
Prep and Cook Time
- Planning: 30 minutes
- Cook Time: 15 minutes (assembly optional)
- Total Time: 45 minutes
Yield
Makes 4 individual pizzas (serves 4)
Difficulty Level
Easy to Medium – perfect for home cooks and families creating personalized lunch kits.
Ingredients
- For the pizza base:
- 2 ½ cups all-purpose flour, sifted
- 1 tsp active dry yeast
- 1 tsp sugar
- ¾ cup warm water (110°F/45°C)
- 1 tbsp olive oil
- 1 tsp salt
- For the sauce options:
- Classic Marinara: 1 cup crushed San Marzano tomatoes, 1 clove minced garlic, 1 tbsp fresh basil, salt to taste
- White garlic Sauce: ½ cup ricotta cheese, 1 tbsp minced garlic, 2 tbsp milk, pinch of nutmeg
- BBQ Sauce: ½ cup barbecue sauce, 1 tsp smoked paprika
- Toppings (choose any mix):
- ¼ cup sliced fresh mushrooms
- ¼ cup diced bell peppers (red, yellow, green)
- ¼ cup black olives, sliced
- ¼ cup pepperoni slices or grilled chicken strips
- ½ cup shredded mozzarella cheese
- Fresh arugula or baby spinach for garnish
Choosing Fresh ingredients for the Perfect Pizza Base
Start with flour that feels soft yet elastic to the touch for a tender crust. Fresh yeast, if available, delivers a lively rise and complex aroma; otherwise, high-quality active dry yeast works wonders. Warm water should be just right to awaken the yeast without killing it (think cozy bathwater temperature). Olive oil lends richness and helps achieve a crisp but chewable bite.
Look for pale, plump tomatoes free from blemishes for your sauces; their natural sweetness and tang form the cornerstone of classic marinara, while creamy ricotta blends beautifully into luscious white garlic sauces. Fresh herbs-especially basil and oregano-inject bright herbal notes that can be varied per sauce style.
Crafting Flavorful Sauces to Suit Every Palate
Nothing elevates pizza more than a thoughtfully crafted sauce base. For an approachable classic, gently simmer crushed tomatoes with garlic and fresh basil until slightly reduced, allowing the sweetness to intensify without losing freshness. Alternatively, a creamy white garlic sauce balances tang with richness-a subtle nutmeg hint makes it exceptionally aromatic and inviting.
For lovers of smoky and sweet, a barbecue sauce infused with smoked paprika ignites the senses, pairing perfectly with grilled meats or veggies.Each sauce can be prepared in advance and packaged in small airtight containers to maintain freshness for your DIY pizza lunch kit.
selecting Toppings That Bring Your Pizza to Life
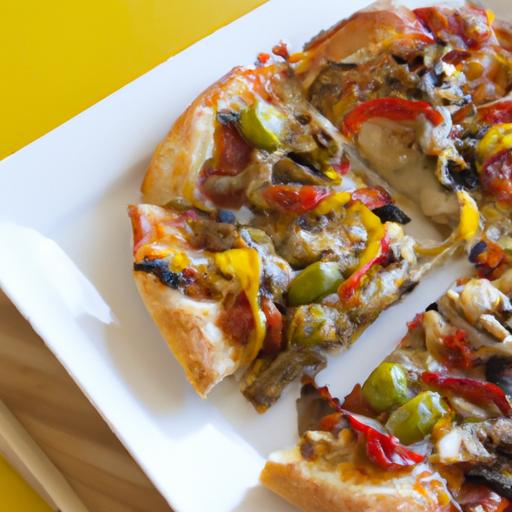
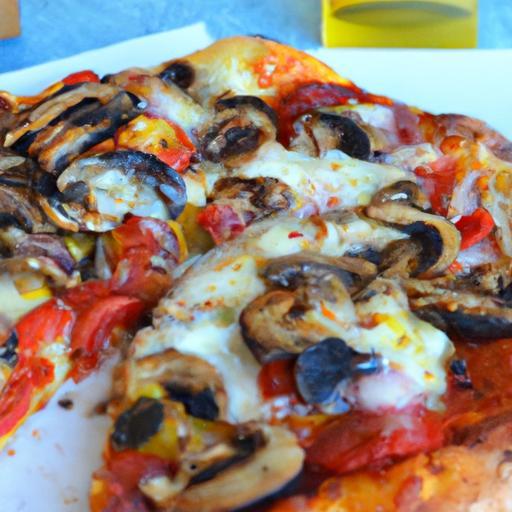
Choose toppings with contrasting textures and colors to create visual appeal and delightful mouthfeel. Crisp bell peppers, juicy mushrooms, and salty black olives provide great variety. For protein, opt for thinly sliced pepperoni or tender grilled chicken pieces that cook quickly and infuse the pizza with savory depth. Generous layering of freshly shredded mozzarella cheese ensures golden bubbling crust and irresistible stretchiness.
When arranging your toppings, think balance: spread them evenly but avoid overcrowding to maintain a crisp crust. Fresh greens like arugula or baby spinach can be added after baking to preserve their delicate texture and peppery bite, creating a vibrant final touch.
Tips for Assembling and Storing Your DIY Pizza Lunch Kit
Assemble your pizza lunch kit with convenience and freshness in mind. Pre-portion your prepared dough rounds and sauces into separate containers. Present toppings in small reusable compartments or airtight snack boxes to keep flavors distinct and prevent sogginess. Include a small cheese packet and fresh garnishes like basil leaves or arugula in a separate vessel.
If assembling ahead, store dough refrigerated and allow it to come to room temperature before stretching.Sauces can be refrigerated up to 3 days, and veggies should be crisp and dry. When reassembling for lunch, encourage baking or warming to revive the dough’s softness and melt the cheese perfectly. This method creates an interactive, fun meal experience while safeguarding ingredient integrity.
Instructions
- Activate the yeast: In a small bowl,combine warm water,sugar,and yeast. Let sit for 5-7 minutes until foamy.
- Make the dough: In a large bowl, whisk flour and salt. Pour in yeast mixture and olive oil. Stir until a shaggy dough forms.
- Knead: Turn dough onto a floured surface. Knead vigorously for 8-10 minutes until smooth and elastic.
- Frist rise: Place dough in a lightly oiled bowl, cover with a damp cloth. Let rise in a warm spot until doubled, about 1 hour.
- Prepare sauces: While dough rises, prepare your choice of sauce. For marinara, gently simmer crushed tomatoes with garlic and basil, seasoning to taste.
- Preheat oven: Set oven to 475°F (245°C). If using a pizza stone, place it in the oven to preheat as well.
- Shape bases: Punch down dough and divide into 4 equal pieces. Roll or press each into a 7-8 inch round on a lightly floured surface.
- assemble pizzas: Spread a thin, even layer of sauce over each base. Add your chosen toppings and cheese evenly.
- Bake: Transfer pizzas to the hot pizza stone or baking sheet. Cook for 12-15 minutes until crust is golden and cheese bubbles.
- Finish and serve: Remove from oven, garnish with fresh greens or herbs. Slice and enjoy instantly or pack into your diy pizza lunch kit.
Chef’s Notes
- For a gluten-free option, use a verified gluten-free flour blend and adjust hydration as needed.
- Substitute fresh herbs with dried if unavailable, but use half the quantity for a balanced flavor.
- Make dough ahead by refrigerating overnight after initial knead-this enhances flavor and eases morning prep.
- Use parchment paper during baking for easy transfer and cleanup.
- If recreating your kit for kids, consider adding small dipping sauces like ranch or honey mustard for variety.
Serving Suggestions
Serve your homemade pizzas with a crisp side salad tossed in light vinaigrette to balance richness. Garnish with a sprinkle of grated Parmesan and a drizzle of extra virgin olive oil for extra flair. Fresh basil leaves add a fragrant finish and vibrant color contrast. Pair with sparkling water infused with lemon or a classic Italian soda to complete the lunch experience.
| Nutrient | Per Serving |
|---|---|
| Calories | 350 kcal |
| Protein | 16 g |
| Carbohydrates | 40 g |
| Fat | 12 g |
For more detailed insights on pizza dough techniques, visit Simply Recipes.
don’t forget to check our DIY Kids Lunch Ideas for creative and wholesome meal plans.

Q&A
Q: What is a DIY Pizza Lunch Kit?
A: A DIY Pizza lunch Kit is a fun, interactive meal setup where you gather all the ingredients needed to build your own personalized pizza.It’s perfect for lunch at home, allowing everyone to customize their pizza just the way they like it.
Q: Why should I make my own pizza lunch kit instead of ordering pizza?
A: Making your own kit is not only cost-effective but also adds a creative and hands-on element to mealtime. It encourages trying new toppings, controlling portion sizes, and involves everyone in the cooking process, making lunch both fun and nutritious.
Q: What basic ingredients do I need to create a DIY pizza lunch kit?
A: Start with a pizza base or crust-this can be store-bought or homemade. Add pizza sauce, shredded cheese, and a variety of toppings such as sliced vegetables, cooked meats, and herbs. Don’t forget some olive oil and optional seasonings like oregano or chili flakes for extra flavor.
Q: How can I keep the ingredients fresh if I prepare the kit in advance?
A: Store perishable ingredients like cheese, meats, and sauces in airtight containers in the refrigerator. Keep veggies crisp by placing them in sealed bags or containers with a paper towel to absorb moisture. Assemble your kit shortly before lunchtime to maintain freshness.
Q: Can this pizza kit be adapted for dietary restrictions?
A: Absolutely! Use gluten-free pizza bases for gluten intolerance, dairy-free cheese alternatives for lactose sensitivity, and plant-based toppings for vegetarian or vegan diets.The beauty of a DIY kit is its flexibility to suit everyone’s needs.
Q: What tools do I need to prepare and assemble the pizza kit?
A: Basic kitchen tools like a cutting board, a knife for chopping toppings, a spoon for spreading sauce, and an oven or toaster oven for baking the pizza are perfect. If you want to skip baking, consider using pre-cooked crusts or flatbreads for a no-bake option.
Q: How do I bake the pizzas once the kit is assembled?
A: Preheat your oven to around 425°F (220°C). Assemble your pizza on a baking tray or pizza stone, then bake for 10-15 minutes or until the crust is golden and cheese is melted and bubbly. Keep an eye on it to avoid burning and adjust timing based on thickness.
Q: Can kids participate in making their own DIY pizza lunch kit?
A: Definitely! It’s a wonderful way to engage children in the kitchen. They can spread sauce, sprinkle cheese, and arrange toppings, helping to develop their cooking skills and creativity in a safe, supervised environment.
Q: How can I make this lunch kit more fun or themed?
A: Get creative with themed toppings or shapes! Try making ”face pizzas” using olives for eyes and pepper strips for smiles, or use cookie cutters to create fun crust shapes. You can also pick toppings based on favorite colors or cuisines to add extra excitement.
Q: what are some quick tips to elevate my DIY pizza lunch kit experience?
A: Use fresh, high-quality ingredients for more vibrant flavors. Add a drizzle of balsamic glaze or a sprinkle of fresh basil after baking. Pair the pizza with a simple salad or fruit for a balanced meal. Moast importantly, enjoy the process and make it a shared, enjoyable experience!
Closing Remarks
Whether you’re crafting a quick lunch for yourself or turning mealtime into a lively activity with friends and family, creating your own DIY pizza lunch kit is a delicious way to spark creativity and enjoy a personalized bite. With endless topping possibilities and the fun of assembling your own pie, this simple project transforms an ordinary lunch into a memorable experience. so gather your favorite ingredients, roll up your sleeves, and let your taste buds take center stage-as the best pizza is the one you make yourself.