In the vibrant world of sushi, where artistry meets tradition, oshizushi-or pressed sushi-stands out as a unique and captivating style. Originating from the Kansai region of Japan, this elegant dish transforms simple ingredients into a beautifully compacted mosaic of flavor and texture. Unlike the more familiar hand-rolled or nigiri sushi, oshizushi is crafted using a wooden mold that presses vinegared rice and fresh toppings into perfect, uniform blocks.
Whether you’re a seasoned sushi enthusiast or an adventurous home cook, mastering the art of oshizushi opens the door to a new dimension of culinary creativity. This step-by-step guide will walk you thru the essentials of making pressed sushi, from selecting ingredients to achieving that iconic pressed shape, empowering you to bring this exquisite Japanese tradition to your own kitchen.
Mastering Oshizushi is a culinary journey into the refined art of pressed sushi, where precision meets tradition. Originating from the Kansai region of Japan, this elegant dish transforms simple ingredients-sushi rice and fresh fish-into beautifully layered blocks of flavor that captivate both the eye and palate. The technique dates back centuries, prized for its firm texture and visually striking presentation. Having crafted oshizushi countless times, I can assure you that its blend of texture, aroma, and artistry makes it a rewarding experience in any home kitchen.
Prep and Cook Time
- Preparation: 25 minutes
- Cooking: 20 minutes
- Total Time: 45 minutes
Yield
4 servings (8 to 10 pieces)
difficulty Level
Medium – requires some attention to detail and layering technique
Ingredients
- 2 cups Japanese short-grain sushi rice
- 2 1/2 cups water
- 1/4 cup rice vinegar
- 2 tablespoons sugar
- 1 teaspoon salt
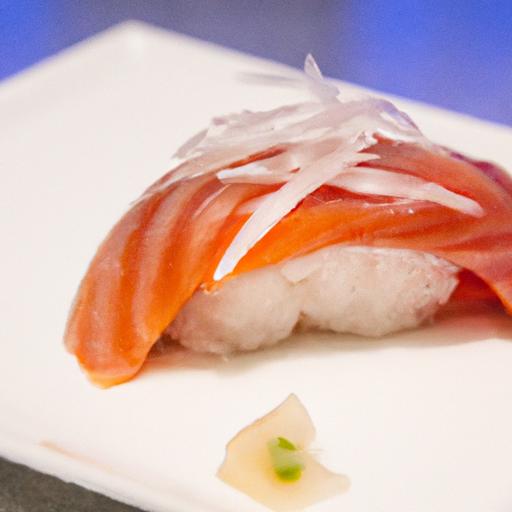
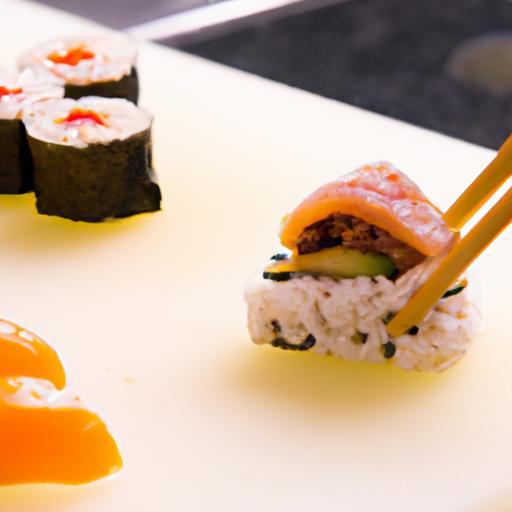
- 200 grams sashimi-grade salmon, thinly sliced
- 100 grams saba (mackerel), marinated in vinegar (optional)
- 1 sheet nori seaweed (optional)
- Pickled ginger and wasabi for serving
- fresh shiso leaves or finely sliced scallions for garnish
Instructions
- Wash the rice thoroughly under cold water until the water runs clear to remove excess starch.This ensures a clean, sticky sushi rice texture.
- Cook the rice with 2 ½ cups of water in a rice cooker or heavy saucepan, allowing it to steam for 10 minutes after cooking for perfect moisture balance.
- Prepare the sushi vinegar by gently warming the rice vinegar, sugar, and salt until dissolved. Let it cool slightly.
- Transfer the cooked rice into a large wooden or glass bowl. Gradually fold in the sushi vinegar mixture with a wooden paddle, fanning the rice simultaneously to cool it quickly and create a glossy finish.
- Line the oshizushi mold (oshibako) with plastic wrap or moisten it lightly to prevent sticking. For a layered effect,optionally place a piece of nori at the bottom.
- Place a layer of thinly sliced salmon evenly in the mold bottom. If using saba, layer it alternately for a traditional touch.
- Press a thin layer of sushi rice over the fish using the oshizushi mold’s top plate, applying firm, even pressure. This compacts the ingredients and ensures sharp edges.
- Add another fish layer if desired, then repeat with the remaining sushi rice. Press firmly again for a compact block.
- Remove the top plate and carefully invert the mold onto a cutting board. Gently peel away the plastic wrap if used.
- Slice the pressed sushi into 2-inch squares or rectangles using a wet knife to prevent sticking. Clean the knife between cuts for clean edges.
Tips for Success
- Rice consistency is key. Avoid overly sticky or dry rice. The perfect balance creates a firm yet tender oshizushi block.
- Use the freshest sashimi-grade fish for safety and taste. If unavailable, lightly cure your fish with a sprinkle of salt or a brief soak in vinegar.
- Press evenly but gently to maintain the delicate fish texture without crushing it.
- Experiment with layers by adding thinly sliced cucumber, tamago (Japanese omelet), or pickled daikon for contrast.
- Make ahead: prepare oshizushi up to 2 hours in advance and keep chilled, covered loosely with plastic wrap.
Serving Suggestions
Serve your pressed sushi on a sleek wooden platter or matte black plate to emphasize its clean, geometric design. Garnish with a few shining shiso leaves and a small mound of pickled ginger on the side to refresh the palate. A delicate drizzle of soy sauce or a brush of yuzu kosho adds a subtle zest. Pair with a chilled cup of green tea or a light sake for a complete sensory experience.
| Nutrient | Per Serving |
|---|---|
| calories | 320 |
| Protein | 22g |
| Carbohydrates | 42g |
| Fat | 6g |
Learn more about perfecting sushi rice
For an authoritative history of oshizushi, visit Japan Guide’s Oshizushi Overview.

Q&A
Q&A: Mastering Oshizushi – Step-by-Step Guide to Pressed Sushi
Q1: What is Oshizushi and how does it differ from other types of sushi?
A: Oshizushi,also known as pressed sushi,is a traditional style from the Kansai region of Japan. Unlike nigiri or maki sushi, which involve hand-pressing rice or rolling ingredients, Oshizushi is made by layering sushi rice and toppings inside a mold called an oshibako and pressing them together firmly. This technique creates a compact, rectangular block that’s sliced into neat, bite-sized pieces. The pressing enhances flavor melding and gives Oshizushi its characteristic dense yet delicate texture.
Q2: What ingredients are essential for making authentic oshizushi?
A: The basics include sushi rice seasoned with vinegar, sugar, and salt; fresh fish or seafood such as mackerel, salmon, or shrimp; and sometiems garnishes like thinly sliced cucumber, pickled ginger, or shiso leaves. The choice of fish varies by region and season, but freshness is paramount. Additionally, a quality wooden or plastic oshibako mold is key for shaping and pressing the sushi perfectly.
Q3: do I need special equipment to make Oshizushi at home?
A: Yes, the oshibako mold is central to making Oshizushi. These molds come in various sizes,often rectangular or square-shaped,typically made from wood or sturdy plastic.If you don’t have one, some creative cooks use small, shallow containers lined with plastic wrap as an option. A sharp knife is also essential for cleanly slicing the pressed sushi without crushing it.
Q4: What are the main steps to prepare Oshizushi?
A:
- Prepare sushi rice: Cook japanese short-grain rice and season it with a blend of rice vinegar, sugar, and salt. Let it cool to room temperature.
- Prepare toppings: Choose and slice fresh fish or seafood thinly; prepare any additional garnishes.
- Assemble layers: Line the mold with plastic wrap, then place a layer of topping on the bottom, followed by an even layer of sushi rice. Some recipes reverse the order,putting rice first.
- Press the sushi: Use the mold’s lid or a flat board to apply firm,even pressure,compressing the layers tightly together.
- unmold and slice: Flip the mold onto a cutting board, remove the lid and mold carefully; slice the block into bite-sized pieces with a wet, sharp knife.
Q5: Are there common mistakes to avoid when making Oshizushi?
A: Absolutely. Avoid over-pressing, which can make the sushi too dense and chewy. On the flip side, under-pressing might cause the layers to fall apart when sliced. Also, be mindful of knife technique-dry knives can tear the sushi, so keep it damp for neat cuts. Lastly, ensure your fish is of the highest freshness and properly prepared to maintain both safety and flavor.
Q6: Can Oshizushi be customized, or shoudl I stick to traditional recipes?
A: While tradition is respected in Japanese cuisine, Oshizushi is wonderfully versatile. Feel free to experiment with different proteins like smoked salmon, eel, or even vegetarian options like marinated vegetables and tofu. The pressing technique remains the heart of the dish, so provided that your layers are balanced and well-pressed, you can put your own creative spin on it.
Q7: How should Oshizushi be served and eaten?
A: oshizushi is typically served sliced into small rectangles or squares, arranged neatly on a platter. It’s enjoyed at room temperature, allowing the flavors to meld fully. Traditionally accompanied by soy sauce, wasabi, and pickled ginger, the compact pieces make it perfect for bento boxes, picnics, or elegant appetizers.
Q8: Any tips for beginners trying Oshizushi for the first time?
A: Start simple-choose one or two toppings you love. Take your time with pressing and slicing,focusing on gentle but firm pressure. Watching video tutorials can help you grasp the technique visually. Lastly, savor the process; oshizushi is as much about mindful preparation as it is about taste.
Mastering Oshizushi combines art and technique, tradition and innovation. With patience and practice, you can bring this beautiful pressed sushi from kitchen to table, delighting both eyes and palate.
Key Takeaways
As you wrap up your journey through the art of oshizushi, remember that mastering this pressed sushi technique is as much about patience as it is about precision. Each layer you press, each slice you make, carries the essence of tradition transformed by your own hands. Whether you’re aiming to impress at your next dinner party or simply savor a new culinary challenge, oshizushi invites you to explore textures, flavors, and craftsmanship in perfect harmony. So gather your ingredients, embrace the rhythm of the press, and let your creativity shape every bite-as in the world of oshizushi, mastery is a tasty adventure waiting to unfold.