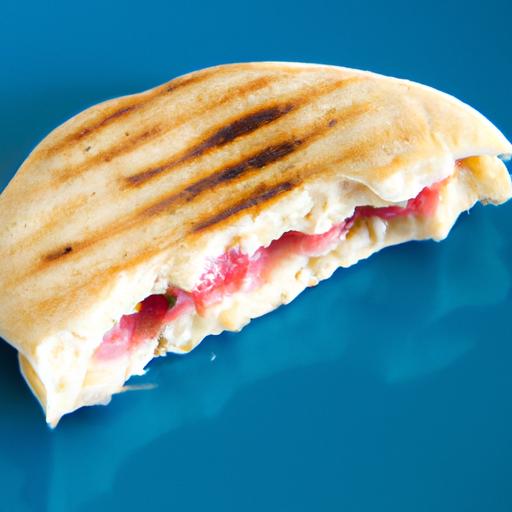
There’s something irresistibly nostalgic about Uncrustables-the simple joy of a perfectly sealed,crust-free sandwich,ready to be enjoyed anytime. but what if you could recreate this lunchbox classic at home,customizing flavors and ingredients to suit your taste,all while keeping it freezer-friendly for quick,hassle-free snacks? In this article,we’ll explore how to make perfect DIY Uncrustables,unlocking the secret to effortless,tasty bites that are as convenient as they are satisfying. Whether your packing school lunches, prepping for busy days, or simply craving a wholesome treat, these homemade gems offer a creative twist on a beloved favorite.
Make Perfect DIY Uncrustables from scratch means choosing ideal ingredients that bring convenience, flavor, and freshness to your freezer-friendly snacks. The magic lies in fresh, quality components that seal flawlessly, keeping each bite delicious and mess-free. Whether you’re crafting classic peanut butter and jelly or experimenting with savory or sweet fillings, the right bread, spreads, and seal technique make all the difference in your homemade Uncrustables.
Prep and Cook Time
- Readiness: 15 minutes
- Sealing and freezing: 10 minutes
- Total Time: 25 minutes
Yield
Makes approximately 8 Uncrustable sandwiches, perfect for quick snacks or packed lunches.
Difficulty Level
Easy – No baking required, just straightforward assembly and sealing.
Ingredients
- 8 slices soft white sandwich bread, crusts removed
- 1/3 cup creamy peanut butter (or any nut/seed butter of choice)
- 1/3 cup fruit jam or jelly, your favorite flavor
- Optional fillings: honey, cream cheese, sliced banana, or thinly sliced deli meats for savory twists
- 1 tablespoon powdered sugar (for dusting and sealing help)
Step-by-Step Guide to Crafting Perfectly Sealed Sandwiches
- Prepare the bread: Gently flatten each slice with a rolling pin to remove air pockets-this helps create an even seal.
- Fill the sandwiches: spread about 2 tablespoons of peanut butter evenly on one slice,avoiding the edges.Add 1 tablespoon of jelly or option filling on top.
- Top with second slice: Place another slice on top, pressing lightly to set the filling without squeezing it out.
- Seal the edges: Lightly dust the edges with powdered sugar to absorb moisture. Using a round sandwich cutter or large cookie cutter (about 3.5 inches diameter), press firmly down the entire perimeter to crimp the edges together. If you don’t have a cutter, use a fork to press a decorative seal along the edges.
- Check for gaps: Inspect each sandwich carefully-no filling should peek out, ensuring the pockets stay intact during freezing.
- Freeze before storing: Lay sandwiches flat on a parchment-lined tray, freeze for 1 hour until firm. This sets the seal and prevents sticking.
Tips for freezing and Storing DIY Uncrustables for Maximum Freshness
- Wrap each sandwich in parchment paper or wax paper before freezing to prevent freezer burn and keep sandwiches separate.
- Place wrapped sandwiches into an airtight freezer-safe bag or container,squeezing out excess air for best results.
- Label each bag with the date made-Uncrustables last best within 2 months frozen.
- To thaw, place sandwiches in the fridge overnight or leave at room temperature for 1-2 hours for an ideal soft texture.
- Refrigerate thawed sandwiches for no longer than 24 hours to maintain freshness and safety.
Creative Filling Ideas to Customize Your Freezer-Friendly Snacks
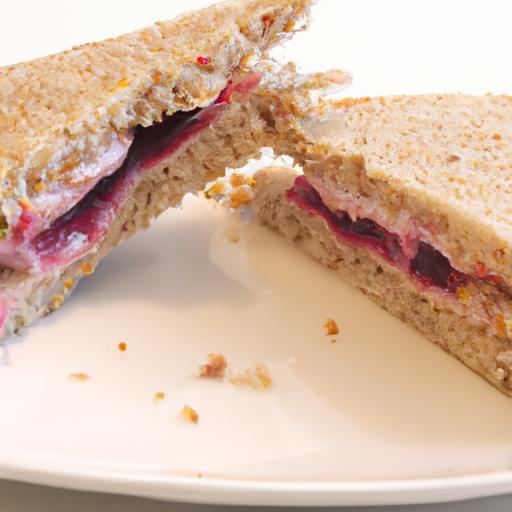
- Classic PB&J: Peanut butter and your favorite strawberry or grape jelly for timeless comfort.
- Fruit & Cream Cheese: Cream cheese spread with sliced strawberries, blueberries, or banana slices for a refreshing twist.
- Nut Butter Variations: Almond, cashew, or sunflower seed butter paired with honey or fig jam adds gourmet flair.
- Savory snacks: Layer thinly sliced turkey, mild cheddar, and honey mustard for a protein-packed lunch option.
- chocolate Lovers: spread Nutella combined with sliced bananas or marshmallow fluff for a decadent treat.
Chef’s Notes and Tips for Success
- Bread selection: Choose soft, squishy sandwich bread without preservatives if possible-day-old bread can be revived by a quick spritz of water and light pressing.
- avoid overfilling: Keep spreads thin and within the edges to prevent leaks during freezing and thawing.
- Seal like a pro: The crimping step is crucial-firm pressure ensures the fillings stay locked inside.
- Freezing shortcut: Flash freeze sandwiches on a tray before wrapping to prevent sticking and maintain shape.
- Allergy-friendly options: Use seed butters and coconut jam for nut-free versions that still offer delicious flavor.
Serving suggestions
Serve these freezer-friendly delights slightly thawed alongside crisp veggie sticks, fruit cups, or a small handful of trail mix for balanced snacking. Garnish plates with fresh mint leaves or a light dusting of powdered sugar for a cafe-style touch. Pair with a cold glass of milk or a smoothie to complement the sandwich’s creamy texture.

| Nutrient | Amount per Sandwich |
|---|---|
| Calories | 250 kcal |
| Protein | 8 g |
| Carbohydrates | 30 g |
| Fat | 12 g |
For more creative sandwich ideas, check out our Easy peanut Butter Dessert Recipes that pair perfectly with your DIY Uncrustables. For detailed food safety tips, visit the USDA Food Safety and Inspection service.
Q&A
Q&A: Make Perfect DIY Uncrustables – Easy Freezer-Friendly Snacks
Q: What exactly are DIY Uncrustables?
A: DIY Uncrustables are homemade versions of the classic crustless peanut butter and jelly sandwiches, designed to be made in bulk and frozen for convenient, grab-and-go snacks. Unlike store-bought versions, you can customize the fillings and control the ingredients.
Q: Why make your own Uncrustables instead of buying them?
A: Making Uncrustables at home saves money, reduces packaging waste, and lets you choose your favorite breads and fillings-whether it’s conventional peanut butter and jelly or creative alternatives like almond butter and honey or nutella and banana.
Q: Which bread works best for DIY Uncrustables?
A: Soft, square sandwich bread is ideal as it seals well when pressed and cuts easily. White, whole wheat, or gluten-free breads all work, just ensure they’re fresh and easy to handle.
Q: How do I prevent the sandwiches from freezing into a solid block?
A: Freeze each Uncrustable on a baking sheet in a single layer until firm, then transfer them to a sealed freezer bag. This prevents them from sticking together and makes portioning simpler.Q: Can I use any filling besides peanut butter and jelly?
A: Absolutely! You can experiment with cream cheese and jam,sun butter and honey,or even savory combinations like hummus and roasted veggies. Just make sure the filling isn’t too wet to avoid soggy bread.
Q: What tools do I need to make perfect DIY Uncrustables?
A: While a simple round cookie cutter or a sandwich cutter helps achieve the signature shape, you can also use a cup or simply cut squares and press edges firmly with a fork to seal.
Q: How long can DIY Uncrustables stay fresh in the freezer?
A: Properly wrapped and stored, they can last up to 3 months in the freezer. When ready to eat, thaw at room temperature or pop in the fridge overnight.
Q: Are DIY Uncrustables kid-friendly?
A: Yes! They’re perfect for kids’ lunches and snacks. You can even get children involved in making them,turning it into a fun and creative kitchen activity.
Q: Any tips for preventing soggy sandwiches after thawing?
A: use thicker spreads, avoid watery fillings, and enjoy the sandwich soon after thawing. toasting lightly can also help restore texture if desired.Q: Can I make these vegan or allergy-friendly?
A: Definitely! Swap peanut butter for sunflower seed butter or other nut-free alternatives, and choose breads and fillings suited to dietary needs. DIY gives you full control over ingredients.With these tips and creative twists, your homemade Uncrustables will become freezer-friendly favorites perfect for busy days and snack attacks alike!
Key Takeaways
Whipping up your own DIY uncrustables is not just a crafty kitchen project-it’s a game-changer for effortless snacking.With a few simple ingredients and a little prep,you create freezer-friendly pockets of convenience that are ready whenever hunger strikes. whether packed in lunchboxes, grabbed on the go, or enjoyed as a quick bite at home, these homemade treats bring both simplicity and satisfaction to your snack routine.So go ahead, roll up your sleeves, and make your freezer a treasure trove of tasty, crust-free delights that everyone will love. Happy snacking!