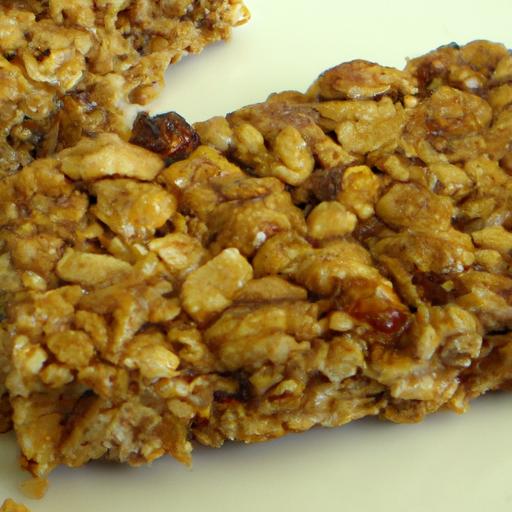
In a world brimming with endless snack options, homemade granola bars offer a delightful blend of simplicity and wholesomeness, inviting you to take control of what fuels your day. Crafting these appetizing treats in your own kitchen not only allows you to tailor flavors and ingredients to your liking but also brings a satisfying sense of accomplishment.Whether you crave a sweet, nutty crunch or a subtly spiced bite, making granola bars at home is a straightforward way to nourish your body and soothe your taste buds-one wholesome, hearty bar at a time.
Crafting delicious homemade granola bars begins with carefully selecting the freshest and most nourishing ingredients to create a perfect harmony of flavor and nutrition. Choosing a blend of wholesome whole grains, crunchy nuts, and naturally sweetened fruits provides a balanced energy boost that satisfies both palate and body.
Choosing Ingredients for Balanced Flavor and Nutrition
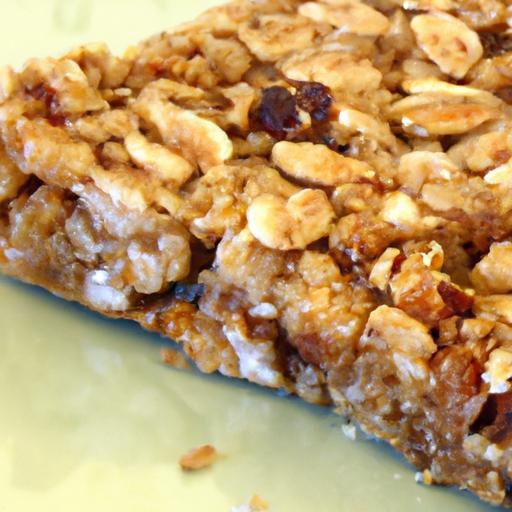
Start with a base of old-fashioned rolled oats for a hearty, chewy texture rich in fiber. Complement these with a mix of raw almonds, walnuts, or pecans for healthy fats and crunch. Incorporate seeds like chia or pumpkin seeds to add a nutritional punch with protein and minerals. Dried fruits such as unsweetened cranberries or raisins infuse bursts of natural sweetness and chewiness without overwhelming the bar. For natural sweetness, consider using raw honey, maple syrup, or mashed ripe banana, which enrich flavor while keeping the recipe wholesome. Balancing these ingredients ensures each bite offers a satisfying texture and nutrient variety, making your homemade granola bars a perfect snack anytime.
Techniques for Achieving the Ideal Texture and consistency
Mastering the texture is crucial for bars that hold together beautifully yet remain tender and chewy. Begin by lightly toasting your oats and nuts before mixing; this step amps up the aroma and deepens the flavor. When blending wet and dry ingredients, combine the natural sweeteners and nut butter until smooth and cohesive – this sticky binder is essential to maintain the bars’ shape without making them overly dense. Press the mixture firmly but evenly into your pan, using parchment paper or a silicone mold for easy removal. Avoid overmixing, which can lead to crumbly bars. Once pressed, chilling the bars for at least two hours solidifies the texture perfectly.
Incorporating Natural Sweeteners and Enhancers for Wholesome Taste
Sweetness in homemade granola bars shouldn’t overpower the wholesome ingredients; rather, it should enhance their natural flavors. Opt for raw honey or maple syrup as gentle sweetening agents that also add a subtle floral depth. For a low-GI option, mashed bananas or unsweetened applesauce work beautifully to bind and sweeten. Consider adding a pinch of sea salt, a dash of cinnamon, or a hint of vanilla extract to awaken the flavors and create complexity. These natural enhancers elevate a simple recipe into something memorable and indulgent without resorting to refined sugars.
Tips for Storing and Customizing Your granola Bars at Home
Proper storage is key to maintaining freshness and texture. Wrap individual bars in parchment paper or store them in an airtight container at room temperature for up to a week. For longer keeping,refrigerate for two weeks or freeze for up to three months-just thaw at room temperature before eating. Personalize your bars by swapping nuts and seeds or adding dark chocolate chips, shredded coconut, or dried blueberries. Customizing both flavor and texture allows you to tailor the bars to your preferences and dietary needs, making every bite unique.
Prep and Cook Time
- Readiness: 15 minutes
- Baking/Toasting: 10 minutes
- Chilling: 2 hours
- Total Time: 2 hours 25 minutes
Yield
12 bars (approximately 2″x3″ each)
Difficulty Level
Easy
Ingredients
- 2 cups old-fashioned rolled oats
- 1/2 cup raw almonds, roughly chopped
- 1/2 cup raw walnuts, roughly chopped
- 1/4 cup pumpkin seeds
- 1/4 cup chia seeds
- 1/2 cup unsweetened dried cranberries
- 1/2 cup natural peanut butter or almond butter
- 1/3 cup raw honey or pure maple syrup
- 1 tsp vanilla extract
- 1/2 tsp ground cinnamon
- 1/4 tsp sea salt
Instructions
- Preheat your oven to 350°F (175°C). Line an 8×8-inch baking pan with parchment paper, leaving an overhang for easy removal.
- Toast the oats, almonds, and walnuts on a baking sheet for 8-10 minutes or until lightly golden, stirring halfway to prevent burning. Remove and let cool slightly.
- In a small saucepan, gently warm the peanut butter and raw honey over low heat, stirring until smoothly combined. Remove from heat and stir in vanilla extract, cinnamon, and sea salt.
- In a large bowl, mix the toasted oats, nuts, pumpkin seeds, chia seeds, and dried cranberries.
- Pour the warm peanut butter mixture over the dry ingredients and stir thoroughly to coat everything evenly.
- Transfer the mixture into the prepared pan. Use a spatula or clean hands to press firmly and evenly into the corners and edges to ensure the bars hold together.
- Chill the pan in the refrigerator for at least 2 hours, or overnight, to set completely.
- Once firm, lift the granola block out using the parchment paper overhang. Cut into 12 bars. Store as advised above.
Chef’s Notes
- For nut-free versions, substitute nut butters with sunflower seed butter and omit tree nuts, adding extra seeds for crunch.
- If your bars crumble, press the mixture more firmly and ensure enough binder (nut butter and sweetener) is used.
- Add a handful of dark chocolate chips after mixing for a decadent touch, but press quickly afterward as chocolate can melt.
- Make-ahead tip: Keep wrapped bars in an airtight container for grab-and-go snacks during busy days.
- Experiment with spices such as nutmeg or cardamom to add warmth and complexity.
Serving Suggestions
Serve your homemade granola bars with a drizzle of dark chocolate or a light spread of nut butter for extra richness. Pair them with fresh fruit and a cup of herbal tea or your favorite coffee for a nourishing breakfast or midday snack.Garnish with a sprinkle of chia seeds or a few fresh berries if presenting for guests to elevate the visual appeal.

| Nutrient | Per Bar (approx.) |
|---|---|
| Calories | 210 |
| Protein | 6g |
| Carbohydrates | 22g |
| Fat | 12g |
For more wholesome snack recipes, check out our Nutritious homemade Snacks Collection. To learn about the benefits of natural sweeteners,visit Healthline’s guide on natural sweeteners.
Q&A
Q&A: Crafting Delicious Homemade Granola Bars-Simple & Wholesome
Q1: Why make homemade granola bars instead of buying store-bought ones?
A1: Homemade granola bars offer complete control over ingredients, allowing you to avoid unwanted preservatives, excess sugars, and artificial additives. Plus, they can be customized to your taste and dietary needs, making them a healthier and often more flavorful snack option.
Q2: What are the basic ingredients needed to make simple granola bars at home?
A2: The foundation typically includes rolled oats, a natural sweetener like honey or maple syrup, and a binding ingredient such as nut butter. From there, you can add nuts, seeds, dried fruits, or spices to enhance texture and flavor.
Q3: How can I ensure my granola bars hold together well and don’t crumble?
A3: The key is to balance wet and dry ingredients. Using sticky binders like nut butter combined with a syrupy sweetener helps the bars stick together when pressed firmly. Chilling the bars after shaping also sets them firmly.
Q4: Are there gluten-free options for granola bars?
A4: Absolutely! use certified gluten-free oats and avoid any add-ins that contain gluten. Many nuts, seeds, and dried fruits are naturally gluten-free, making it easy to craft bars suitable for gluten-sensitive diets.
Q5: Can homemade granola bars be customized for different nutritional goals?
A5: Definitely. For added protein, try incorporating protein powder or extra nuts. for healthy fats, include chia or flax seeds. To reduce sugar content,cut back on sweeteners or use naturally sweet dried fruits. The recipe is versatile and adapts to your wellness goals.
Q6: What’s the best way to store granola bars to keep them fresh?
A6: Store them in an airtight container at room temperature for up to a week. For longer shelf life, refrigerate or freeze them. When frozen, wrap individual bars so you can grab a quick snack without thawing the entire batch.
Q7: Are there any common mistakes to avoid when making homemade granola bars?
A7: Overbaking can dry out the bars, making them crumbly. Also, skimping on the binder can cause them to fall apart. Be sure to measure ingredients carefully and press the mixture firmly into the pan before baking or chilling.
Q8: What’s a creative twist to make granola bars more exciting?
A8: Experiment with adding dark chocolate chunks, coconut flakes, or spices like cinnamon and cardamom. Swapping customary nuts for pistachios or adding a touch of citrus zest can elevate flavor profiles and keep the snack experience fresh and interesting.
This Q&A provides insights into crafting simple, wholesome, and delicious homemade granola bars, empowering you to create personalized snacks that nourish and delight.
The Way Forward
Whether you’re seeking a quick breakfast, a midday energy boost, or a wholesome snack on the go, crafting your own homemade granola bars offers a perfect blend of simplicity and nourishment. With just a handful of natural ingredients and a touch of creativity, you can customize each batch to suit your taste and dietary needs. Embrace the process, experiment with flavors, and enjoy the satisfying reward of a delicious, wholesome treat made entirely by you. Homemade granola bars aren’t just snacks-they’re a small, tasty festivity of mindful eating.