
There is something undeniably enchanting about the baguette-a symbol of French culinary heritage, celebrated for its crisp crust, airy crumb, and timeless elegance. Yet, achieving that perfect balance of texture and flavor at home can seem elusive to many. In this article, we’ll demystify the process and guide you through simple, approachable steps to master the art of shaping the perfect baguette. Whether you’re a seasoned baker or a curious beginner,preparing these iconic loaves offers a rewarding journey that blends technique with creativity,turning basic ingredients into a delicious work of art.
Mastering the Art: Simple Steps to Shape the Perfect Baguette
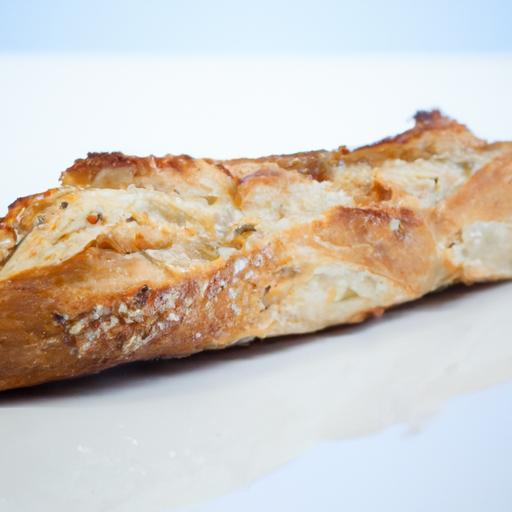
Mastering the art of baguette making begins with impeccable ingredients and thoughtful techniques that celebrate French tradition. The beauty of an authentic baguette lies in its rustic charm-thin, golden crust with a crackling sound, and an airy, open crumb structure that delights the senses. This timeless bread has inspired bakers worldwide, and with some guidance, you too can craft baguettes that boast irresistible texture and flavor right from your home oven.
Prep and Cook Time
- Planning: 25 minutes (plus 12-18 hours fermentation/resting)
- Baking: 20-25 minutes
- Total Time: Approximately 14-18 hours including fermentation
Yield
Makes 3 classic French baguettes (each about 14-16 inches long)
Difficulty level
Medium – Requires patience and precision, perfect for enthusiastic home bakers
Ingredients
- 500 g bread flour (preferably high-protein for better gluten development)
- 350 ml cold filtered water
- 10 g fine sea salt
- 2 g active dry yeast or instant yeast
Instructions
- Activate the yeast: In a small bowl, dissolve yeast in 50 ml of water (lukewarm, about 35°C/95°F). Let it bloom until frothy, about 5-7 minutes.
- Mix the dough: In a large bowl, combine bread flour and sea salt. Add activated yeast and the remaining 300 ml cold water. Stir with a wooden spoon or dough whisk until a shaggy dough forms. Be gentle-this hydration level creates a loose, sticky dough.
- Bulk fermentation: Cover the bowl with a damp towel or plastic wrap. Let it ferment at room temperature (about 21°C/70°F) for 12-18 hours or overnight, allowing natural flavor and gluten to develop fully.
- Stretch and folds: During the first 2 hours of fermentation, perform 3 sets of stretch and folds every 30 minutes: wet your hand, pull a dough edge up, and fold it over the center. This strengthens the dough’s structure.
- Pre-shape the dough: Transfer the dough onto a lightly floured surface. Gently divide into 3 equal portions using a bench scraper. Shape each into a loose oval and let rest for 20 minutes under a towel.
- Final shaping: Working with one piece at a time,flatten gently into a rectangle.Fold the long edges to the center, then roll tightly into a cylinder, tapering the ends slightly to achieve the classic baguette silhouette. Use your fingers to seal seams well.
- Proofing: Place shaped baguettes seam-side down on a floured couche or parchment-lined baking tray. Cover loosely and proof until doubled in size-about 1-2 hours at room temp. Feel for springiness: a gentle poke should slowly bounce back.
- Prep the oven: Preheat to 250°C (482°F) with a baking stone or steel on the middle rack. Place a metal pan on the bottom for steam generation.
- Scoring: Using a sharp lame or razor blade, make 3-4 diagonal slashes (about ¼ inch deep) lengthwise on each baguette. this allows controlled expansion and forms the signature ears of the crust.
- baking with steam: Slide baguettes onto the hot stone. Pour 1 cup boiling water into the empty pan to create steam. This initial burst of steam ensures a glossy, crackling crust.
- Bake: Bake for 20 minutes, lowering temperature to 230°C (446°F) after the first 10 minutes. Remove the steam pan after 10 minutes to let the crust crisp up fully.
- Cooling: Transfer baked baguettes to a wire rack and let cool completely before slicing. This resting allows crumb to set and flavors to deepen.
Tips for Success: Techniques for Achieving the Perfect Crust and Crumb
- Flour choice is key: High-protein bread flour builds a resilient gluten matrix essential to trap the gaseous bubbles creating the open crumb.
- water temperature and method matter: Cold water and slow fermentation develop complex flavors reminiscent of artisan boulangeries.
- Patience with proofing: Avoid rushing the final proof to prevent overly dense bread. Look for gentle spring back, not full collapse.
- Steam is essential: It delays crust hardening in the oven, enabling the dough to expand and form that iconic crust texture.
Shaping Secrets to Craft a Classic Baguette Form
Delicate folding and gentle rolling techniques create the long, slender shape that defines the baguette. Avoid excessive flour use-too much can hinder proper rise; a dab will suffice to prevent sticking. Pay close attention to tapering ends evenly, which ensures balanced baking.
Baking Tips to Ensure Consistent Texture and Flavor
- Invest in a baking stone or steel: These tools provide radiant heat that mimics professional hearth ovens, encouraging even color and crust development.
- Maintain oven humidity: Steam can be recreated with water pans or simply spraying the oven walls before loading the dough.
- Monitor internal temperature: Baguettes are done when internal temp reaches about 96°C (205°F); use an instant-read thermometer for precision.
Serving Suggestions
Enjoy your baguette fresh with a thin layer of cultured butter and flaky sea salt or alongside a rustic ratatouille. Garnish with fresh herbs such as rosemary or thyme for an aromatic twist. For an inspired pairing, serve with aged cheeses or charcuterie, accentuating the bread’s subtle nutty undertones.

Nutritional information (per 100 g slice)
| Calories | Protein | Carbs | Fat |
|---|---|---|---|
| 270 kcal | 9 g | 56 g | 1 g |
For further inspiration on artisan bread techniques, explore our Artisan Bread Techniques Guide. To dive deeper into yeast fermentation science and techniques, visit king Arthur Baking’s fermentation primer.
Q&A
Q&A: Mastering the Art – Simple Steps to Shape the Perfect Baguette
Q1: Why is shaping the baguette considered an art?
A1: Shaping a baguette goes beyond mere technique; it’s about creating the bread’s signature form that influences its texture, crumb, and crust. The artisan’s touch transforms simple dough into that iconic long, slender loaf with the perfect crust-to-crumb ratio, making the shaping process both a functional and creative act.
Q2: What’s the first essential step in shaping a baguette?
A2: The initial step is to gently degas the dough by pressing it down lightly to remove large air bubbles. This sets the stage for uniform shaping.From there, folding the dough helps build surface tension, which is key for achieving the baguette’s structure.
Q3: How important is the tension in the dough during shaping?
A3: Tension is critical.It gives the baguette its spring and helps it maintain its shape throughout proofing and baking. Proper tension prevents the dough from spreading too much and promotes that lovely, crisp crust.
Q4: Are there simple tools that can definitely help shape a baguette?
A4: While shaping can be done entirely by hand,tools like a bench scraper help manage sticky dough and ensure clean folds. A couche-a heavy linen cloth-is also handy for supporting shaped dough during proofing,preserving tension and preventing sticking.
Q5: Can beginners master shaping with practice alone?
A5: Absolutely. Like any craft, consistent practice enhances muscle memory and intuition. Starting with small batches, focusing on gentle handling, and experimenting with shaping techniques will eventually lead to mastering the perfect baguette form.
Q6: How does the shaping impact the final texture and crust?
A6: Shaping controls the dough’s internal structure. Proper shaping encourages even gas distribution, which creates an open crumb. Plus, it influences how steam interacts with the dough in the oven, affecting crust development-leading to that sought-after crisp exterior.
Q7: What common mistakes should one avoid when shaping baguettes?
A7: Avoid over-handling the dough, which can deflate it excessively. Also, insufficient tension leads to flat, misshapen loaves, while too much pulling can tear the dough. Balancing gentle yet purposeful shaping is key.
Q8: Any final tips for shaping the perfect baguette?
A8: Patience and respect for the dough are vital. Work gently, keep your hands lightly floured but not dry, and trust the process. over time, shaping will feel less like a chore and more like an expressive art form that brings the perfect baguette within reach.
Closing Remarks
Whether you’re a seasoned baker or a curious beginner, shaping the perfect baguette is a rewarding art that transforms simple ingredients into a timeless classic.With patience, practice, and the right techniques, each loaf you craft will tell a story of dedication and delicious mastery. So roll up your sleeves, embrace the process, and let every baguette be a testament to the simple joy of baking done well.