There’s something undeniably satisfying about pulling a golden, bubbling pizza from your own oven-a creation that begins with the moast essential ingredient: the dough. Crafting the perfect homemade pizza dough might sound like an art reserved for seasoned chefs, but with a few simple ingredients and some straightforward steps, anyone can master it. This recipe strips away the complexity,guiding you through the process of transforming basic staples into a tender,flavorful foundation for endless pizza possibilities. Whether you’re a casual cook or a dedicated foodie,this approachable guide will have you kneading,rising,and baking your way to pizza perfection in no time.
Crafting perfect homemade pizza dough begins with understanding the vital role flour plays in shaping the final texture. The choice between all-purpose, bread, or “00” flour sets the foundation for a crust that’s both fluffy and chewy, a combination that delights with every bite.
Choosing the Ideal Flour for Fluffy and Chewy Texture
Every bite of pizza dough is a testament to your flour choice. Bread flour, with its higher protein content (typically 12-14%), develops more gluten, lending elasticity and chewy texture that stands up well to toppings. On the other hand, “00” flour, the Italian gold standard, offers a silky fine grind ideal for a tender yet crisp crust. All-purpose flour (around 10-11% protein) is a convenient mid-ground,delivering a soft result,but if you crave that signature chew,bread flour or a “00” blend is your best bet.
Mastering the Art of Dough Hydration and Kneading Techniques
Hydration-the ratio of water to flour-is a secret behind an airy crumb and tender chew. Higher hydration (65-70%) produces an open, bubbly texture reminiscent of classic Neapolitan pizzas. Start by adding lukewarm water gradually to the flour, allowing the dough to absorb moisture fully. Kneading then activates gluten development; aim for 8-10 minutes by hand or 5-6 minutes using a stand mixer on medium speed. The windowpane test is your ally here: stretch a small dough piece thinly until translucent without tearing to know it’s ready.
The Importance of Fermentation Time for Flavor Development
Fermentation does more then raise dough – it unlocks complex flavors. A slow, cold ferment in the fridge for 24 to 72 hours allows beneficial yeasts and bacteria to create subtle tang, enriching the dough with depth akin to artisan bread. If pressed for time, a warm, quicker rise of 1.5-2 hours can still yield a satisfying crust,but longer fermentation promises that signature taste and texture. Remember to bring chilled dough to room temperature before shaping for optimal elasticity.
tips for Achieving the Perfect Thin and Crispy Crust
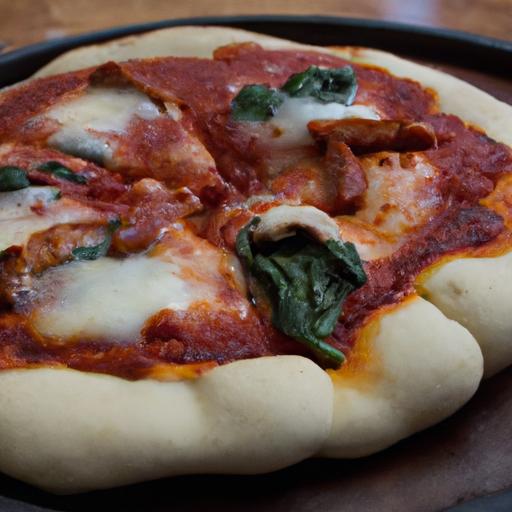
For those craving a thin, crispy crust that crackles delightfully with each bite, rolling your dough evenly thin and preheating your pizza stone or steel to high temperatures (ideally between 500-550°F/260-290°C) are crucial steps. Dust your peel or baking surface with semolina or cornmeal to prevent sticking and help create a crunchier bottom. Bake quickly (8-12 minutes depending on oven strength) to retain a crisp edge while maintaining slight chewiness inside. Underbaking will leave soggy spots; keep a close eye during these last minutes to secure perfection.
Prep and cook Time
- Preparation: 20 minutes
- Fermentation: 24 to 72 hours (slow rise)
- Baking: 8-12 minutes per pizza
Yield
Yields 2 large 12-inch pizzas or 4 individual personal pizzas
Difficulty Level
medium – Requires dough handling experience and fermentation planning,but simple with practice.
Ingredients
- 3 ½ cups bread flour (or “00” flour for finer crumb)
- 1 ¼ cups lukewarm water (65% hydration)
- 2 teaspoons salt
- 1 teaspoon sugar
- 2 ¼ teaspoons active dry yeast (1 packet)
- 2 tablespoons olive oil
Instructions
- Activate yeast: In a small bowl,mix lukewarm water,sugar,and yeast. Let sit 5-10 minutes until foamy.
- Combine dry ingredients: In a large bowl, whisk together bread flour and salt.
- Mix dough: Slowly pour yeast mixture and olive oil into flour.Stir with a wooden spoon until shaggy dough forms.
- Knead the dough: Transfer to a floured surface, knead for 8-10 minutes until smooth and elastic. Alternatively, knead in a stand mixer with a dough hook for 5-6 minutes.
- First rise: Place dough in a lightly oiled bowl, cover with a damp cloth or plastic wrap, and let rise in a warm place until doubled, about 1.5-2 hours.
- Cold fermentation: Punch down dough, divide into 2 or 4 portions, place in airtight containers or bags, and refrigerate for 24-72 hours to develop flavor.
- Shape and bake: Remove dough from fridge, rest at room temperature for 1 hour. Preheat oven with pizza stone to 500°F (260°C). Stretch dough thin, add toppings, and bake for 8-12 minutes until edges are golden and crisp.
Tips for Success
- Use a kitchen scale for precise flour and water measurement to maintain hydration accuracy.
- If dough feels sticky, lightly flour your hands and surface but avoid adding excess flour that may toughen crust.
- Extending cold fermentation to 72 hours enhances flavor complexity but don’t exceed 72 hours to prevent over-fermentation.
- Consider resting dough balls overnight at room temperature if you prefer quicker fermentation but less flavor depth.
- For ultra-thin crusts, use a rolling pin before gently stretching by hand.
- Use a pizza peel dusted with cornmeal or semolina for effortless transfer onto the hot stone.
Serving Suggestions
Enjoy your homemade pizza with a drizzle of extra virgin olive oil and a sprinkle of fresh basil or oregano for vibrant aroma. Serve alongside a crisp mixed greens salad tossed with lemon vinaigrette to balance richness. For a finishing touch, shaved Parmesan or a sprinkle of red pepper flakes elevate each slice’s flavor. Pair with a chilled Italian red wine or sparkling water infused with lemon for a refreshing complement.

| Nutritional Data (per serving) | Amount |
|---|---|
| Calories | 280 kcal |
| Protein | 9 g |
| Carbohydrates | 53 g |
| Fat | 4.5 g |
For further insights into the science of pizza dough, visit Serious eats’ Food Lab Pizza Dough Guide, a trusted culinary resource spotlighting fermentation and ingredient tips.
Explore more recipes like this homemade pasta recipes to expand your Italian kitchen expertise.
Q&A
Q&A: Crafting Perfect Homemade Pizza Dough – A Simple Recipe
Q1: Why make pizza dough from scratch instead of buying pre-made dough?
A1: Crafting pizza dough at home puts you in full control of the ingredients and texture. Fresh dough offers a superior bounce, flavor, and aroma that store-bought options rarely match.Plus, it’s a rewarding culinary experience that allows you to tailor your crust’s thickness, chewiness, and crispness exactly to your liking.
Q2: What are the basic ingredients needed for homemade pizza dough?
A2: The core ingredients are simple and pantry-amiable: all-purpose flour, warm water, active dry yeast, salt, and a touch of olive oil. These humble elements come together to create the perfect foundation for your pizza masterpiece.Q3: How vital is the yeast in pizza dough, and how does it work?
A3: Yeast is the magic agent that breathes life into your dough. It feeds on sugars in the flour, producing carbon dioxide that causes the dough to rise and develop airy pockets. Using fresh, active yeast and the right water temperature ensures your dough will have excellent texture and rise beautifully.
Q4: Can I make the dough ahead of time?
A4: Absolutely! Homemade pizza dough actually benefits from time. Allowing it to rise slowly in the refrigerator overnight develops deeper flavor and a more complex texture. Just remember to bring the dough back to room temperature before shaping and baking.
Q5: What’s the secret to getting a perfectly crisp yet chewy crust?
A5: Achieving that ideal balance lies in your dough hydration and baking technique.Using the right ratio of water to flour (usually around 60-65%) creates gluten structure for chewiness, while baking on a preheated stone or steel at a high temperature crisps the exterior beautifully.
Q6: Can I customize the dough for different types of pizza crusts?
A6: Definitely! By tweaking ingredients or resting times, you can craft thin-crust crispy pizzas, thick and fluffy Neapolitan-style pies, or even a cracker-like base. Adding herbs or garlic powder to the dough is a creative way to infuse extra flavor right into the crust.
Q7: What are common pitfalls to avoid when making pizza dough?
A7: Overworking the dough can make it tough; underproofing it results in dense crusts. Also, avoid using water that’s too hot, which can kill the yeast, or too cold, which slows rising. Patience and gentle handling go a long way toward a dough that’s soft, stretchy, and full of life.
Q8: How do I know when the dough is ready to use?
A8: When the dough has doubled in size and gently springs back when poked, it’s ready. This indicates that the yeast has done its job, and the dough is airy and elastic, perfect for stretching out and topping with your favorite ingredients.
Q9: Is it necessary to use a pizza stone or steel to bake homemade pizza?
A9: While not mandatory, a pizza stone or steel greatly improves heat retention and distribution, mimicking professional ovens and yielding a crispier crust. If you don’t have one, a preheated baking sheet can work in a pinch; just be mindful that the crust may be less blistered.
Q10: Any tips for shaping dough without it shrinking back?
A10: Let the dough rest after initial shaping to relax the gluten strands, which reduces elasticity and shrinking. Avoid using a rolling pin-stretch gently with your hands to preserve those tasty air pockets. Working on a floured surface or using a bit of olive oil can also prevent sticking.
With this Q&A guide, your journey to crafting perfect homemade pizza dough becomes approachable and enjoyable. Embrace the process and watch simple ingredients transform into a canvas for your favorite toppings and flavors!
Insights and Conclusions
With just a handful of basic ingredients and a little patience, crafting the perfect homemade pizza dough becomes less of a task and more of a rewarding ritual. whether you’re aiming for a thin, crispy crust or a soft, chewy base, this simple recipe lays the foundation for endless culinary creativity. So next time hunger strikes, remember that the heart of a great pizza starts with dough you’ve made yourself-inviting you to savor every slice with a satisfying sense of accomplishment.