There’s something undeniably enchanting about the delicate swirl of a classic French crepe-the thin, tender pancake that carries centuries of culinary tradition folded within its golden layers.Whether enjoyed wiht a simple dusting of sugar, a drizzle of syrup, or a lavish filling, crepes offer a versatile canvas for both sweet and savory creations. Mastering the art of making these iconic treats might seem daunting, but with the right technique and a straightforward recipe, anyone can bring a touch of Parisian flair to their kitchen.In this guide,we’ll unravel the secrets behind perfect crepes,making it easy for you to create crispy,lacy edges and soft centers every time. Get ready to transform ordinary ingredients into a timeless delight.
Master the art of Classic French Crepes brings you into the world of delicate,paper-thin pancakes that have enchanted taste buds for centuries. Originating from the Brittany region of France, crepes embody simplicity and elegance, transforming humble ingredients into a versatile canvas of sweet and savory delights.The tender texture and subtle flavour balance make them irresistible,inviting you to explore endless filling possibilities and authentic cooking methods.
Prep and Cook Time
- Preparation: 15 minutes
- Resting Time: 1 hour (for best texture)
- Cooking: 20 minutes
- Total Time: Approximately 1 hour 35 minutes
Yield
- Serves 4 (about 12 crepes)
Difficulty Level
- Easy to Medium – perfect for home cooks looking to elevate their breakfast or brunch experience.
Ingredients
- 1 cup all-purpose flour, sifted to ensure smooth batter
- 2 large eggs, at room temperature
- 1 1/4 cups whole milk, warmed slightly for better incorporation
- 2 tablespoons unsalted butter, melted, plus extra for cooking
- 1 tablespoon granulated sugar (optional, for sweeter crepes)
- 1 pinch of salt
- 1 teaspoon pure vanilla extract (optional, especially for sweet crepes)
Instructions
- Mix dry ingredients: In a large bowl, whisk together the sifted flour, sugar (if using), and salt to evenly distribute.
- Combine eggs with liquid: In a separate bowl, beat the eggs and then gradually whisk in the warmed milk and vanilla extract.
- Create a smooth batter: Slowly pour the wet ingredients into the dry, whisking constantly to prevent lumps. The batter should be thin and smooth,almost like heavy cream.
- Add melted butter: Stir in the melted butter to enrich the batter and enhance the tenderness of each crepe.
- Rest for perfect texture: Cover the bowl with plastic wrap and refrigerate the batter for at least 1 hour. This allows the flour to fully absorb the liquid and helps relax the gluten for ultra-thin crepes.
- Prepare the pan: Heat a non-stick crepe pan or heavy skillet over medium-high heat. Lightly grease with butter using a paper towel to avoid excess.
- Cook crepes: Pour a small ladle (approx. 1/4 cup) of batter into the hot pan, tilting and swirling to evenly coat the surface with a thin layer.
- Flip carefully: Cook until the edges lift and turn golden, about 1-2 minutes, then gently flip with a thin spatula and cook the other side for 30 seconds.
- Stack and keep warm: Transfer cooked crepes to a plate, stacking them with a clean kitchen towel to retain warmth and moisture.
- Repeat: Continue until all batter is used, adjusting heat as necessary to prevent burning or sticking.
Tips for Success
- Use room temperature ingredients to ensure a smooth batter without curdling.
- Resting the batter is key to achieving that trademark thin and tender consistency.
- Keep your skillet dry but hot between crepes; too much butter will fry rather than gently cook them.
- If the batter is too thick after resting, thin it with a tablespoon of milk until pourable.
- For gluten-free variations, substitute all-purpose flour with buckwheat flour for an authentic Breton flavor.
- Make-ahead tip: Prepare batter the night before and store tightly covered in the refrigerator for convenience.
Creative Filling Ideas to Elevate Your Classic Crepes
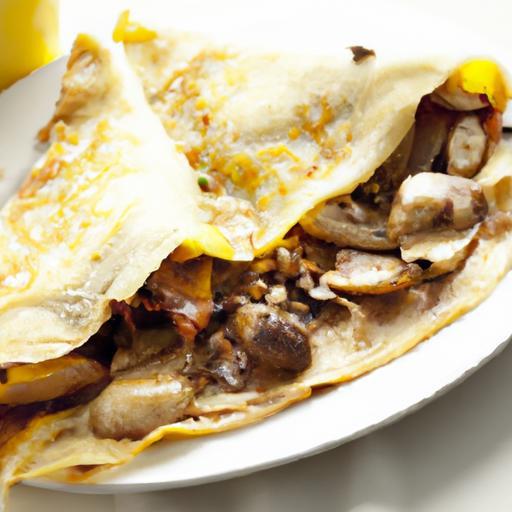
- Savory: Sautéed mushrooms with garlic and thyme, melted Gruyère cheese, ham, and a drizzle of Dijon mustard.
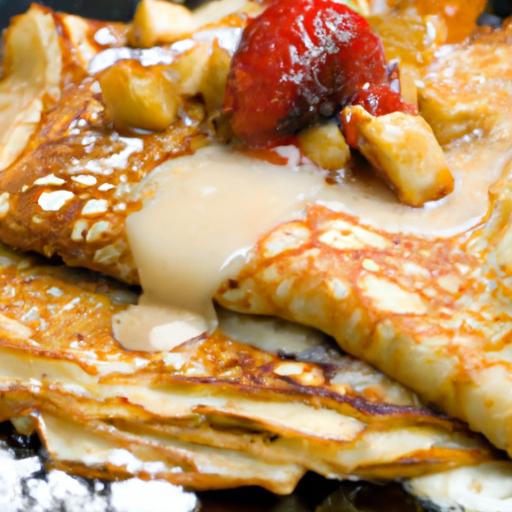
- Sweet: Fresh berries with mascarpone and a sprinkle of powdered sugar,classic Nutella with sliced bananas,or lemon juice with a dusting of sugar for a simple but elegant finish.
- Decadent: Whipped cream and caramelized pears finished with toasted almonds or crème pâtissière with chocolate sauce.
Tips for Cooking and Serving Like a Parisian Chef
- Always use a non-stick crepe pan or a seasoned cast iron skillet for the best results.
- Maintain medium-high heat to get that delicate golden colour without drying the crepe out.
- Serve instantly or keep wrapped in a warm towel to maintain moisture and softness.
- Garnish with fresh mint leaves, edible flowers, or a light dusting of powdered sugar for stunning presentation.
- Pair with a sparkling mimosa or hot café au lait for an authentic Parisian brunch experience.
| Nutritional Info (per crepe) | Calories | Protein | Carbs | Fat |
|---|---|---|---|---|
| Classic French Crepe | 110 kcal | 4g | 15g | 4.5g |

To deepen your crepe expertise, explore our related guide on French Sauces to Complement Your Crepes. For historical context and traditional techniques, visit France.fr – French Cuisine.
Q&A
Q&A: Master the Art of Classic French Crepes – Easy Recipe Guide
Q1: What makes classic French crepes different from other types of pancakes?
A: Classic French crepes are thinner and more delicate compared to typical American pancakes. They have a smooth, almost lace-like texture that allows them to be rolled or folded with sweet or savory fillings. Unlike thicker pancakes, crepes rely on a simple batter of flour, eggs, milk, and a touch of butter, creating a light and versatile base.
Q2: What are the essential ingredients for making an authentic French crepe batter?
A: The core ingredients include all-purpose flour, fresh eggs, whole milk, a pinch of salt, and melted butter. Some recipes add a little sugar for sweetness or vanilla extract for enhanced flavor,especially if you’re preparing sweet crepes. The balance of these ingredients is key to achieving the perfect texture.
Q3: Can I make the crepe batter in advance? If so, how should I store it?
A: Yes! Crepe batter can be made a few hours or even a day ahead. After mixing, cover the bowl tightly with plastic wrap and refrigerate. This resting period allows the flour to fully hydrate and results in more elastic and tender crepes.Just give the batter a gentle stir before cooking, as some settling may occur.
Q4: What’s the secret to cooking crepes without tearing or sticking?
A: A non-stick skillet or a well-seasoned crepe pan is your best friend. Heat the pan over medium heat and lightly brush it with melted butter or oil just before pouring the batter. Pour just enough batter to coat the pan with a thin layer, then swirl quickly to spread it evenly. Cook until the edges lift easily – about 1-2 minutes – then flip gently and cook the other side briefly.Q5: How can I customize crepes for sweet and savory options?
A: Crepes are wonderfully versatile. For sweet varieties, try fillings like Nutella, fresh berries, lemon juice and sugar, whipped cream, or jam. For savory crepes, fillings such as ham and cheese, sautéed mushrooms, spinach with goat cheese, or smoked salmon with crème fraîche shine beautifully.Feel free to experiment with herbs, spices, and sauces to create your signature crepe.
Q6: Are there any common mistakes to avoid when making crepes at home?
A: Common pitfalls include batter that’s too thick (leading to thick, pancake-like crepes), cooking at too high a heat (causing burning or uneven cooking), and flipping too early or roughly (which can tear the crepe).Also, avoid overworking the batter once the flour is added, as this can make crepes tough rather than tender.
Q7: What tips can help beginners gain confidence in making crepes?
A: Start with a small, well-seasoned pan and keep the heat moderate. Practice pouring and swirling the batter evenly.Don’t worry if the first few crepes aren’t perfect; consistency improves quickly with experience. Keep extra butter or oil handy to maintain the pan’s non-stick surface. Lastly, enjoy the process-making crepes is both an art and a joy!
In Summary
Whether you’re savoring them sweet with a dusting of powdered sugar or dressing them up with savory fillings, mastering the art of classic French crepes opens a world of culinary possibilities. This easy recipe guide serves as your first step toward creating delicate, versatile pancakes that can transform any meal into a moment of simple elegance. So, roll up your sleeves, embrace the rhythm of the batter, and let each crepe you craft be a testament to timeless French tradition made effortlessly your own. Bon appétit!