There’s an undeniable allure to a cake that looks as flawless as it tastes-a glossy, glass-like surface that catches the eye and promises a decadent experience with every slice. Enter the mirror glaze cake: a stunning dessert that combines artistry and technique, transforming a simple cake into a dazzling centerpiece. Whether you’re a seasoned baker or an keen beginner, mastering the mirror glaze may seem daunting, but the results are well worth the effort. in this article, we’ll guide you through a step-by-step mirror glaze cake recipe, revealing tips and tricks to achieve that pristine, shiny perfection every time.Get ready to elevate your baking to a whole new level of elegance.
Shiny Perfection begins with choosing the ideal ingredients that ensure your mirror glaze has that flawless, glossy finish everyone admires.The secret lies not only in quality but in balance – the right mix of gelatin, chocolate, and sweetened condensed milk creates a silky pour that clings perfectly to your cake, like liquid glass.
Choosing the Ideal Ingredients for a Glossy Mirror Glaze
to achieve shiny perfection, start with a high-quality white or sweetened condensed milk. This adds richness and provides a smooth texture that pours evenly. Use powdered gelatin instead of sheets for more consistent bloom and faster melting. Belgian couverture chocolate, preferably at 30-35% cocoa fat, melts smoothly and gives that pristine shine. Avoid lower-grade chocolate or chips that contain stabilizers which can dull the glaze.
Pure vanilla extract or natural flavor oils awaken the flavors without compromising texture. For vibrant color, opt for gel or powdered food coloring – liquid dyes can break the emulsion and cause uneven spots.
Mastering the Technique of Achieving the Perfect Pour
Temperature control is the cornerstone of shiny perfection. Pour your glaze between 90-95°F (32-35°C), warm enough to flow smoothly but cool enough to hold its mirror-like gleam without melting your cake’s crumb. Use a wire rack over a tray to catch excess glaze and ensure full coverage.
Before pouring, gently whisk your glaze to remove air bubbles, but do not overbeat or incorporate foam. Pour in one steady, even motion, starting from the center and moving outward in circular sweeps.
Tips for Decorating and Presenting Your Mirror Glaze Cake
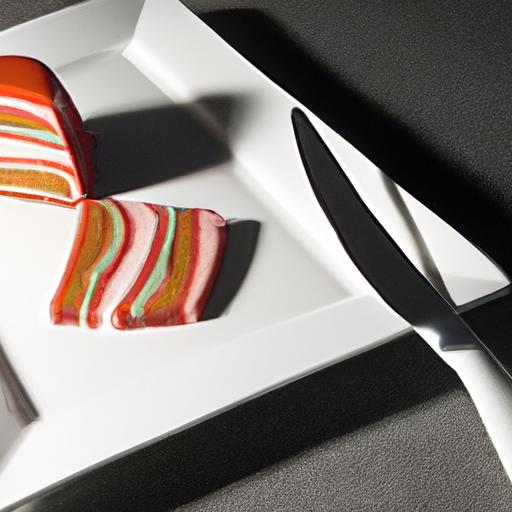
After your glaze has set for about 10 minutes at room temperature, enhance the cake’s allure with delicate touches. Use edible gold leaf, fresh berries, or edible flowers as accents. A dusting of powdered sugar or cocoa powder on a contrasting plate adds sophistication without overpowering the glaze’s brilliance.
Slice with a long, sharp knife dipped in hot water between cuts for clean edges that maintain that glossy finish.
Troubleshooting Common Mirror Glaze Challenges
If your glaze appears dull or cloudy, it’s frequently enough due to incorrect temperature or imperfect gelatin bloom. Always soften gelatin in cold water before melting gently to avoid clumps. If the glaze is too runny, refrigerate it briefly before pouring. If it sets too fast, warm it slightly over a bain-marie.
Air bubbles can be popped with a toothpick or smoothed with a spatula quickly after pouring. Avoid refrigeration directly after glazing; let the cake set at room temperature to preserve that iconic shine.
Prep and Cook Time
- Prep: 20 minutes
- Chilling: 4 hours (for cake and glaze setting)
- Total Time: 4 hours 30 minutes
Yield
serves 10-12 slices
Difficulty Level
Medium to Advanced
Ingredients
- 200g white chocolate, finely chopped
- 150ml sweetened condensed milk
- 150ml water
- 12g powdered gelatin (≈4 sheets equivalent), bloomed in 60ml cold water
- 100g granulated sugar
- Vanilla extract, 1 teaspoon
- Gel food coloring (optional), as desired
Instructions
- Bloom the gelatin: Sprinkle powdered gelatin over cold water and let it soften for 5-10 minutes.
- Heat liquids: In a saucepan,combine water,sugar,and sweetened condensed milk; bring to a gentle boil,stirring constantly to dissolve sugar wholly.
- Add gelatin: Remove from heat and whisk in the bloomed gelatin until fully dissolved.
- Pour over chocolate: Place chopped white chocolate in a heatproof bowl, slowly pour hot mixture over, then let sit for 2 minutes to melt the chocolate.
- Emulsify glaze: Using a hand blender,blend gently in short bursts until smooth and glossy. Avoid incorporating air bubbles.
- Add vanilla and color: Stir in vanilla extract and gel food coloring until uniformly tinted.
- Cool glaze: Let the glaze sit at room temperature, stirring occasionally until it reaches 90-95°F (32-35°C), the ideal pouring temperature.
- Prepare cake: Ensure your chilled cake is smooth and firm, ideally frozen overnight, then place on a wire rack over a tray.
- Pour glaze: In a smooth, continuous motion, pour glaze over the center of the cake, letting it flow evenly down the sides to cover entirely.
- Set glaze: Let the glaze settle at room temperature for 10-15 minutes before transferring to fridge to chill further or serve.
Tips for Success
- Use a digital thermometer for precise temperature control – it’s critical for achieving shiny perfection.
- Freeze your cake before glazing to prevent melting and to help set the glaze faster with a smooth finish.
- Warm your knife blade between slices by dipping in hot water to keep the cut edges sharp and glossy.
- Prepare more glaze than you think you need; some dripping off is inevitable for that perfect, smooth finish.
- If your glaze thickens too much, gently reheat in a bain-marie to regain ideal pouring consistency without overcooking.
Serving Suggestions
Present your mirror glaze cake on a sleek white platter to make the shiny surface pop under natural light. Garnish with fresh berries for a burst of color or scatter edible gold dust around the edges for luxe appeal.Pair with a light herbal tea or sparkling wine to complement the richness without overwhelming the palate.
| Nutrition (per slice) | Calories | Protein | Carbs | Fat |
|---|---|---|---|---|
| Mirror Glaze Cake | 320 kcal | 4g | 40g | 15g |

Explore more on how to perfect cake techniques in our Ultimate Chocolate Mousse Guide and broaden your dessert expertise. For detailed gelatin facts visit the Gelatin 101 guide by Collagen Complete.
Q&A
Q&A: Shiny Perfection – A Step-by-Step Mirror Glaze Cake Recipe
Q1: What exactly is a mirror glaze cake?
A1: A mirror glaze cake is a dessert masterpiece characterized by its ultra-smooth, glossy surface that reflects light like a mirror. This shiny coating is typically made from a combination of gelatin, sugar, water, condensed milk, and white chocolate, poured over a chilled cake to create a flawless finish.
Q2: Why is the glaze so shiny and reflective?
A2: The secret to that brilliant shine lies in the carefully balanced ingredients and the temperature at which the glaze is poured. The gelatin provides elasticity and a smooth texture, while the white chocolate and condensed milk add richness and opacity. When poured at the right temperature, the glaze sets with that signature mirror-like sheen.
Q3: Can I create colored or patterned mirror glazes?
A3: Absolutely! Gel food coloring can be added to the glaze for vibrant, vivid hues. For artistic flair, you can pour different colors together or use spatulas and toothpicks to swirl together multiple colors, producing stunning marbled or abstract patterns that elevate the cake’s visual impact.
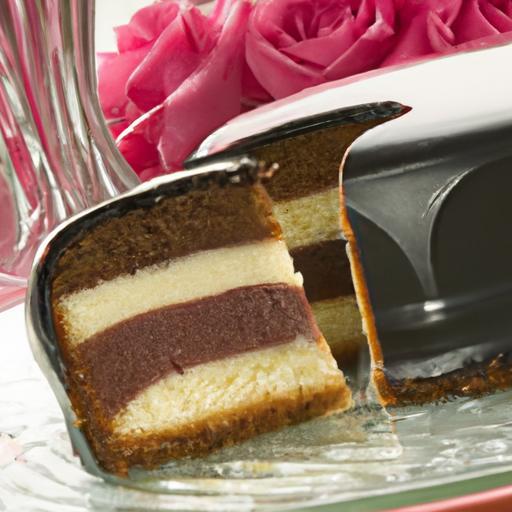
Q4: What type of cake works best under a mirror glaze?
A4: Mirror glaze works beautifully over smooth, dense cakes such as mousse cakes, sponge cakes with a thin layer of frosting, or cheesecakes.The key is a firm, chilled surface for the glaze to adhere to without melting or seeping through.
Q5: How do I ensure my glaze doesn’t crack or bubble?
A5: Prevention is mostly about technique. Make sure the glaze is strained to remove lumps or bubbles before pouring. Pour the glaze at the optimal temperature-typically around 90°F (32°C)-to ensure it’s fluid enough to coat without cracking.Also,the cake shoudl be well chilled,usually frozen,so the glaze cools immediatly upon contact,setting perfectly smooth.
Q6: Is mirror glazing arduous for beginners?
A6: While mirror glaze does require some attention to detail, it’s surprisingly approachable with practice. Following a step-by-step recipe and understanding the importance of temperature control and preparation will help even novice bakers achieve that striking, professional look.
Q7: How long does the glaze stay shiny after application?
A7: The glaze maintains its glossy appearance best when refrigerated and consumed within 24 to 48 hours. Over time, condensation can form on the surface, dulling the shine. Serving the cake soon after glazing ensures maximum visual impact.
Q8: Can I prepare the mirror glaze in advance?
A8: Yes, the glaze can be made ahead of time and stored in the refrigerator. Before use, gently rewarm and stir it to return to the proper pouring consistency. Avoid overheating to preserve the gelatin’s setting properties.
Q9: Any tips for serving a mirror glaze cake?
A9: For clean,flawless slices,use a sharp knife dipped in hot water and wiped dry between cuts. This helps the blade glide through the glaze and cake layers without dragging or smudging the glossy finish.
Q10: What makes a mirror glaze cake so special?
A10: Beyond its visual allure, the mirror glaze cake is a celebration of culinary artistry-a perfect blend of technique and creativity. Its shiny, smooth surface invites admiration, while the luscious glaze adds a delicate sweetness that enhances the cake’s overall flavor and texture, making every bite a memorable experience.
In Retrospect
With its glass-like finish and vibrant hues, a mirror glaze cake transforms any dessert into a stunning centerpiece. By following these step-by-step instructions, you can master the art of creating that flawless, reflective surface-turning simple ingredients into edible works of art. Whether for a special occasion or just to indulge your creative side, this recipe invites you to experiment, perfect, and enjoy the sweet satisfaction of shiny perfection. Happy glazing!