
Ther’s something undeniably magical about pulling a warm,pillowy naan straight from the pan-its soft layers still steaming,the aroma inviting you to tear off a piece and savor it fresh. While naan bread is ofen synonymous with restaurant feasts and exotic menus, mastering this beloved staple at home is simpler than you might think. In this article, we’ll guide you through the art of making homemade naan: a journey of simple ingredients, straightforward techniques, and the rewarding promise of fresh, fluffy bread that elevates any meal. Whether you’re a seasoned cook or a curious beginner, embrace the charm of crafting naan from scratch and bring a timeless tradition right into yoru kitchen.
Master the Art of Homemade Naan Bread: Simple and Fresh
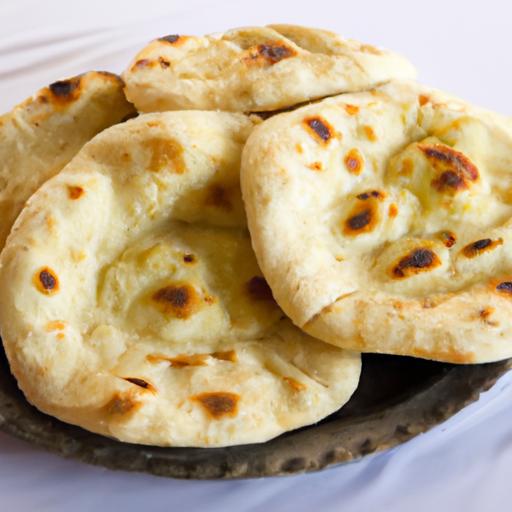
Master the art of homemade naan bread: simple and fresh with ingredients and techniques that capture the authentic soul of this beloved Indian flatbread. Originating from the tandoors of India and Central Asia, naan is a soft, pillowy bread that elevates every meal it accompanies. I vividly remember the joy of tasting freshly made naan for the first time-warm, slightly charred, and sprinkled with butter-its texture almost magical. Recreating that experience at home is not only deeply satisfying but also easier than you might think.
Prep and Cook Time
- Readiness: 15 minutes
- Resting/Proofing: 1 hour
- Cooking: 10-12 minutes
Yield
Makes 6 medium-sized naans, perfect for serving 3-4 people.
Difficulty Level
Easy to Medium – ideal for beginner home cooks eager to master bread-making.
Ingredients
- 2 cups all-purpose flour, sifted
- 1 tsp active dry yeast
- 1 tsp sugar
- ½ tsp salt
- ¾ cup warm water (110°F / 45°C)
- 2 tbsp plain yogurt, at room temperature
- 1 tbsp vegetable oil (plus extra for cooking)
- 2 tbsp melted butter, for brushing
- Optional: garlic cloves finely minced or chopped fresh cilantro for garnish
Instructions
- Activate the yeast: In a small bowl, combine warm water, sugar, and yeast. Allow to sit for 5-7 minutes until frothy and bubbling. This step ensures your dough will rise beautifully.
- Mix dry ingredients: In a large mixing bowl,whisk together the flour and salt. Make a well in the center.
- Combine wet and dry: Pour the activated yeast mixture, yogurt, and oil into the flour well. Stir gently using a wooden spoon or your hand until dough starts to come together.
- Knead the dough: Turn the dough onto a lightly floured surface. Knead vigorously for about 8-10 minutes until the dough is smooth, elastic, and slightly tacky but not sticky. Incorporate flour sparingly as needed.
- First proof: Lightly oil a clean bowl, place the dough inside, and cover with a damp cloth or plastic wrap. Let it rest in a warm spot for 1 hour or until doubled in size. This step is key to achieving that soft and fluffy texture.
- Divide and shape: Punch down the dough and divide it into 6 equal portions. Roll each piece into a tight ball and cover loosely with a kitchen towel while preparing to cook.
- Roll out the naans: On a lightly floured surface, roll each ball into an oval or teardrop shape, about ¼-inch thick. Avoid rolling to thin to retain softness.
- Preheat your pan: Place a heavy-bottomed skillet or cast-iron pan on medium-high heat and let it become very hot-this mimics the intense heat of a tandoor.
- Cook the naan: Lightly oil the pan and place one rolled naan on it. Cook until bubbles form and the underside is golden brown, about 1-2 minutes. Flip and cook the other side for another 1-2 minutes, pressing gently with a spatula to ensure even contact.
- Finish and garnish: Remove cooked naan from the pan and promptly brush with melted butter. For a classic flavor, sprinkle with minced garlic or fresh cilantro before serving.
- Repeat: Continue cooking the remaining naans using the same process, adding oil as needed to prevent sticking.
tips for success
- softness comes from yogurt: Including yogurt in the dough adds tenderness and a slight tang, making it a crucial ingredient for authentic naan.
- Use warm water: Water that’s too hot can kill yeast; too cold and it won’t activate properly. Aim for about 110°F (45°C) for perfect proofing.
- Resting time matters: don’t rush the first rise. It allows gluten development and fermentation, creating a light and airy texture.
- Cook over high heat: A very hot pan is essential to create the signature blistering and slight char typical of naan.
- Make ahead: Dough can be refrigerated overnight. Bring to room temperature before rolling and cooking for best results.
Serving Suggestions
Serve your naan fresh and warm alongside flavorful curries, lentil dals, or grilled kebabs. Garnish with a brush of garlic butter and sprinkle of fresh cilantro for radiant color and aroma. For a creative twist, try topping with crumbled feta, za’atar, or a drizzle of chili-infused oil. Complement with a cooling cucumber raita or tangy mango chutney to complete the experience.
| Nutritional Information (per naan) | Calories | Protein (g) | carbs (g) | Fat (g) |
|---|---|---|---|---|
| Basic Naan Bread | 180 | 5 | 35 | 3 |
For more bread recipes, explore our guide on easy homemade flatbreads. To deepen your understanding of dough fermentation, visit this informative article from King Arthur Baking.

Q&A
Q&A: Master the Art of Homemade naan Bread: Simple and Fresh
Q1: What makes homemade naan bread different from store-bought versions?
A1: Homemade naan offers a freshness and authenticity that store-bought varieties often lack.When made from scratch, you control the ingredients, resulting in a softer texture, more pronounced flavors, and the satisfying warmth of bread straight from your own kitchen.
Q2: Is making naan bread at home arduous for beginners?
A2: Not at all! With a few basic ingredients and clear steps,beginners can easily master naan. The dough is forgiving, and the cooking process-whether on a skillet or in an oven-is straightforward. Practice and patience will lead to perfectly puffed, delicious naan.
Q3: What are the essential ingredients for conventional naan bread?
A3: Traditional naan requires simple pantry staples: all-purpose flour, yeast, yogurt, warm water, sugar, salt, and a bit of oil or ghee for richness.The yogurt adds a subtle tang and helps create that soft, chewy texture naan is known for.
Q4: How can I achieve the characteristic soft and fluffy texture of naan?
A4: Key factors include allowing the dough to rest and rise adequately, incorporating yogurt for tenderness, and cooking the naan at high heat. This combination creates those signature air pockets and soft crumb that make naan irresistible.
Q5: Can I customize naan with flavors or toppings?
A5: Absolutely! naan pairs well with garlic, herbs like cilantro, nigella seeds, or even cheese stuffed inside. Experimenting with toppings before cooking adds delicious variety while keeping the bread fresh and vibrant.
Q6: What’s the best cooking method for homemade naan?
A6: A hot cast-iron skillet or a heavy-bottomed pan works wonders, mimicking the intense heat of a tandoor oven.You can also bake naan on a pizza stone in a very hot oven. Both methods deliver that lovely char and slightly crisp edges that enhance texture and taste.
Q7: How should I store leftover naan bread?
A7: Naan tastes best fresh but can be wrapped tightly in foil or plastic wrap and kept at room temperature for a day or two.For longer storage,freeze naan in airtight bags and reheat with a fast toast or warm-up in a pan to restore softness.
Q8: What dishes pair well with homemade naan?
A8: Naan is wonderfully versatile-perfect alongside curries, kebabs, grilled vegetables, or even as a base for wraps and sandwiches. Its mild, buttery flavor complements bold, spicy dishes and can also be enjoyed simply with a smear of butter or chutney.
Q9: Why should I consider making naan bread at home instead of buying it?
A9: Homemade naan brings a rewarding sense of accomplishment, customizable freshness, and wholesome ingredients without preservatives. Plus, it fills your kitchen with enticing aromas and offers an authentic touch to any meal.
Q10: Any tips for first-timers wanting to master naan bread?
A10: Take your time with the dough’s resting phase to develop flavor and texture. Keep your cooking surface hot and avoid flipping the naan too early. Don’t be discouraged by imperfections-the charm of homemade naan lies in its rustic, heartwarming character. Enjoy the process as much as the delicious results!
In Conclusion
From the gentle kneading of the dough to the warm, fragrant pull of freshly baked naan, mastering this timeless bread brings a satisfying connection to the heart of homemade cooking. With simple ingredients and a bit of patience,you can transform your kitchen into a cozy bakery where every bite tastes like tradition and comfort.So, roll up your sleeves, embrace the process, and let each naan you make tell a story of warmth, flavor, and the joy of fresh, homemade food.