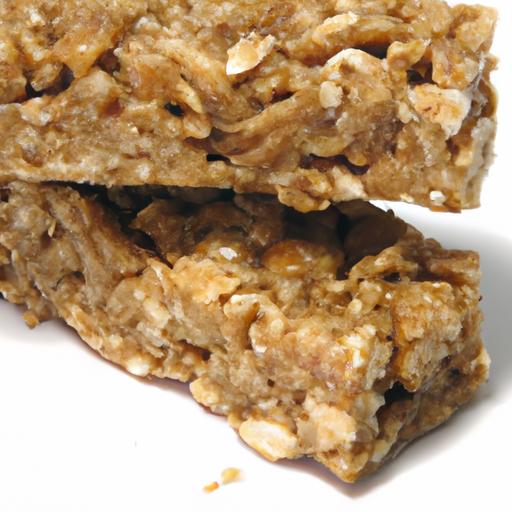
In the fast-paced rhythm of everyday life,finding snacks that are both nutritious and convenient can often feel like a challenge. Enter the world of easy homemade no-bake granola bars-a perfect blend of wholesome ingredients and quick readiness that satisfies hunger without compromising on taste or health. Whether you’re packing a lunchbox, fueling a midday slump, or simply craving a guilt-free treat, these granola bars offer a simple solution that’s as satisfying to make as it is to eat. Join us as we explore how to create these flavorful,no-bake snacks that combine natural goodness with delightful flavors,all from the comfort of your own kitchen.
Easy homemade no-bake granola bars offer a convenient, nutritious, and irresistibly delicious snack option perfect for any time of day. Rooted in the creativity of combining wholesome ingredients without the need for an oven, these bars bring together a medley of textures and flavors that energize and satisfy. Whether you’re packing lunches, fueling workouts, or just craving a sweet yet healthy treat, mastering these bars sets you up for endless homemade snack success.
Prep and Cook Time
Preparation: 15 minutes | Chilling: 1 hour
Yield
Makes 12 bars
Difficulty Level
Easy
Ingredients
- 2 cups rolled oats (old-fashioned, for a hearty chew)
- 1 cup natural peanut butter (or almond butter for a subtle twist)
- 1/2 cup honey (or pure maple syrup for a vegan-friendly option)
- 1/2 cup chopped nuts (almonds, walnuts, or pecans)
- 1/3 cup mini dark chocolate chips (optional, for a touch of indulgence)
- 1/4 cup chia seeds (for added fiber and crunch)
- 1/2 cup dried cranberries (or raisins, for natural sweetness)
- 1 teaspoon vanilla extract
- 1/4 teaspoon sea salt
Instructions
- Prepare your pan: Line an 8×8-inch square pan with parchment paper, allowing excess to hang over the sides for easy lifting later.
- Mix wet ingredients: In a medium saucepan, gently warm the peanut butter and honey over low heat until fully combined, stirring occasionally for about 2-3 minutes.
- Add vanilla and salt: Remove from heat and stir in the vanilla extract and sea salt, enhancing the flavor depth of your bars.
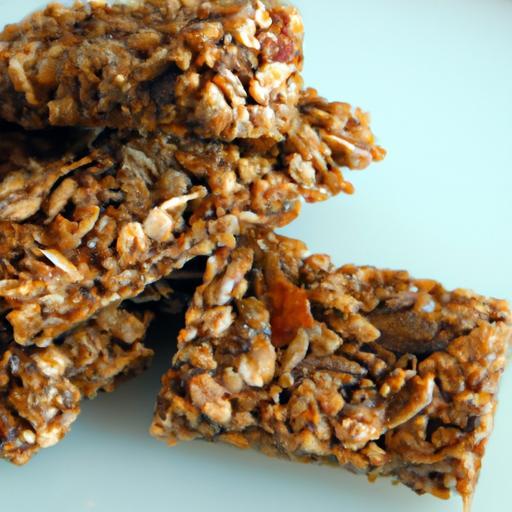
- Combine dry ingredients: In a large bowl,mix together rolled oats,chopped nuts,chia seeds,dried cranberries,and chocolate chips,if using,for a vibrant texture profile.
- Incorporate wet and dry: Pour the warm peanut butter mixture over the dry blend. Use a rubber spatula to fold until every oat and nut is fully coated and sticky.
- Press mixture firmly: Transfer the sticky blend into the prepared pan. Press down with a spatula or clean hands firmly to ensure the bars hold together after chill.
- Chill to set: Refrigerate for at least 1 hour or until bars are firm to the touch.
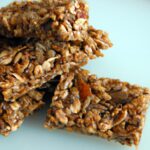
- Slice and serve: Use the parchment edges to lift out the slab. Cut into 12 evenly sized bars with a sharp knife.
- Enjoy or store: Serve immediately or keep them fresh (see Storage section below).
Tips for Customizing Flavors and textures to Suit Every Taste
These bars are highly adaptable. Swap peanut butter for sunflower seed butter if nut allergies are a concern. For extra nutty crunch, add toasted coconut flakes or pumpkin seeds. Craving sweetness without chocolate? Toss in chopped dried apricots or dates. To boost protein, stir in a scoop of your favorite plant-based protein powder with the oats. Keep texture balanced by maintaining a ratio of sticky binder (peanut butter + honey) to dry ingredients-too little binder will cause crumbling,too much will make the bars overly soft.
Storing and Serving Suggestions to Keep Your Granola Bars Fresh and Delicious
Wrap individual bars in parchment or beeswax wraps for grab-and-go snacks. Store airtight in the refrigerator for up to 2 weeks or freeze for longer shelf life-just thaw at room temperature before enjoying. Presentation-wise, stack bars on a rustic wooden board with fresh fruit, or serve alongside a cup of herbal tea for a wholesome snack break. garnish with a sprinkle of chia seeds or a drizzle of dark chocolate for a gourmet touch that invites compliments.
| Nutrient | Per Bar (approx.) |
|---|---|
| Calories | 180 kcal |
| Protein | 5 g |
| Carbohydrates | 22 g |
| Fat | 8 g |

Discover more wholesome snack ideas in our Healthy Snack Recipes collection. For additional nutritional insights on ingredients like oats and chia seeds, consult the American Nutrition Association.
Q&A
Q&A: Easy Homemade No-Bake Granola Bars - healthy and Tasty Snacks
Q1: What makes no-bake granola bars a good snack choice?
A1: No-bake granola bars are convenient, quick to prepare, and require no oven time, making them perfect for busy schedules.They’re often packed with wholesome ingredients like oats, nuts, and natural sweeteners, providing sustained energy without processed additives.
Q2: Are no-bake granola bars as nutritious as baked ones?
A2: Absolutely! Both types can be equally nutritious depending on the ingredients used. No-bake bars frequently enough retain more of the natural texture and nutrients as they aren’t exposed to heat,which sometimes diminishes certain vitamins.
Q3: What are the key ingredients used in homemade no-bake granola bars?
A3: The basic formula typically includes rolled oats,nut butters (like almond or peanut butter),a sweetener such as honey or maple syrup,and mix-ins like nuts,seeds,dried fruits,or chocolate chips. This combination provides a balance of carbohydrates, protein, and healthy fats.
Q4: How can I customize no-bake granola bars to suit my taste or dietary needs?
A4: The beauty of homemade bars is their flexibility! Swap out nuts for seeds if you have allergies, use gluten-free oats for gluten sensitivities, choose your preferred sweetener, or add superfoods like chia seeds or flaxseeds for extra nutrition. You can also adjust sweetness and textures by varying mix-in quantities.
Q5: How shoudl I store no-bake granola bars to keep them fresh?
A5: Store the bars in an airtight container at room temperature for up to a week. For longer preservation, refrigerate them for up to two weeks or freeze for up to three months. Wrapping them individually makes for easy grab-and-go snacks.
Q6: Can kids enjoy these no-bake granola bars?
A6: Definitely! They’re a wholesome,tasty option that kids can even help make. Just be mindful of any nut allergies and adjust ingredients accordingly. The soft, chewy texture and natural sweetness usually appeal to younger palates.
Q7: Why choose homemade over store-bought granola bars?
A7: Homemade no-bake granola bars allow full control over ingredients, avoiding preservatives, excess sugars, and artificial flavors commonly found in commercial bars. Plus, making them yourself is cost-effective and can be a fun kitchen activity.
Q8: Are these bars suitable as a pre- or post-workout snack?
A8: Yes,they’re a great energy booster before workouts due to their carbohydrate content and provide essential nutrients for recovery afterward when balanced with protein from nuts or seeds.
Q9: Can I use other sweeteners besides honey and maple syrup?
A9: Yes, option sweeteners like agave nectar, brown rice syrup, or even mashed bananas can work well, though they may alter the flavor and texture slightly. Experiment to find your preferred taste!
Q10: What’s the easiest way to shape no-bake granola bars?
A10: Press the mixture firmly into a lined baking dish or pan using the back of a spoon or your hands to create an even layer. Chill in the fridge until set,then cut into bars or squares for serving. Using parchment paper makes removal simpler and cleanup easier.
In Summary
Whether you’re rushing out the door or settling in for a cozy afternoon, these easy homemade no-bake granola bars offer a perfect balance of health and convenience. With simple ingredients and no oven required, they invite you to customize flavors and textures to suit your taste buds. Next time hunger strikes, skip the store-bought options and enjoy a wholesome snack crafted by your own hands-because good food doesn’t have to be complicated to be delicious.