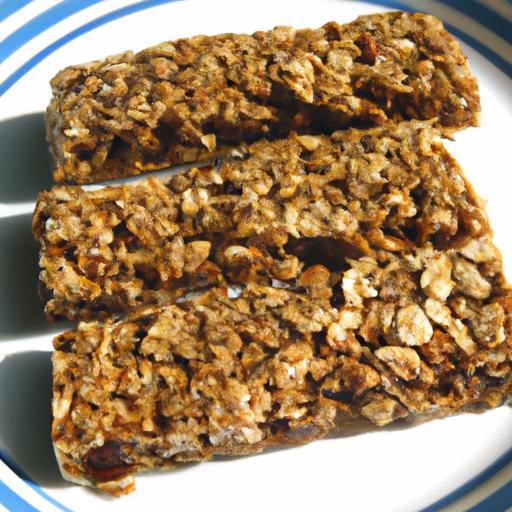
In the hustle and bustle of daily life, finding a snack that’s both nutritious and convenient can feel like a challenge. Enter the easy homemade no-bake granola bar-a simple yet satisfying treat that combines wholesome ingredients with effortless planning. Perfect for busy mornings, afternoon pick-me-ups, or post-workout fuel, these bars offer a healthy alternative to store-bought snacks without the added preservatives or hidden sugars. In this article, we’ll explore how to create your own delicious batch of no-bake granola bars, crafted to suit your taste and lifestyle, all from the comfort of your kitchen.
Easy Homemade No-Bake Granola Bars are a perfect blend of wholesome ingredients and convenience, transforming your snack time into a nourishing experience. Originating as a swift energy booster for outdoor adventurers, these bars have evolved into a beloved household treat, offering both health and flavor in every bite. Crafted without an oven, they capture the natural textures and sweetness of nuts, seeds, and dried fruits, making them ideal for busy days or a midday pick-me-up.
Prep and Cook Time
Prep: 15 minutes | No baking required
Yield
8 bars (approximately 2 inches each)
Difficulty Level
Easy – perfect for beginners and seasoned snack crafters alike
Ingredients
- 2 cups rolled oats (old-fashioned, for best texture)
- 1 cup mixed nuts (such as almonds, walnuts, and cashews, roughly chopped)
- 1/2 cup sunflower seeds (unsalted)
- 1/2 cup natural almond butter (or peanut butter for a milder taste)
- 1/3 cup honey (raw or organic for natural sweetness)
- 1/4 cup dried cranberries (unsweetened)
- 1 tsp pure vanilla extract
- 1/4 tsp sea salt
- Optional: 2 tbsp chia seeds or flaxseeds for added nutrition
Step-by-Step Instructions
- Prepare the dry ingredients: In a large mixing bowl, combine the rolled oats, mixed nuts, sunflower seeds, dried cranberries, and optional chia seeds or flaxseeds.Stir gently to blend.
- Heat the wet ingredients: In a small saucepan over low heat, warm the almond butter, honey, vanilla extract, and salt together. Stir continuously until the mixture is smooth and slightly runny, about 3-4 minutes. Avoid overheating to preserve the natural enzymes.
- Combine: Pour the warm wet mixture over the dry ingredients. Stir thoroughly with a wooden spoon or silicone spatula, ensuring every oat and nut is evenly coated with the sticky binder.
- Press and shape: Line an 8×8-inch baking dish with parchment paper, leaving enough overhang for easy removal. Transfer the granola mixture and press firmly into the pan, compressing it tightly to prevent crumbling after setting.
- chill and set: Refrigerate the pan for at least 2 hours, or until the bars are fully firm. For quicker results, place in the freezer for 30-45 minutes.
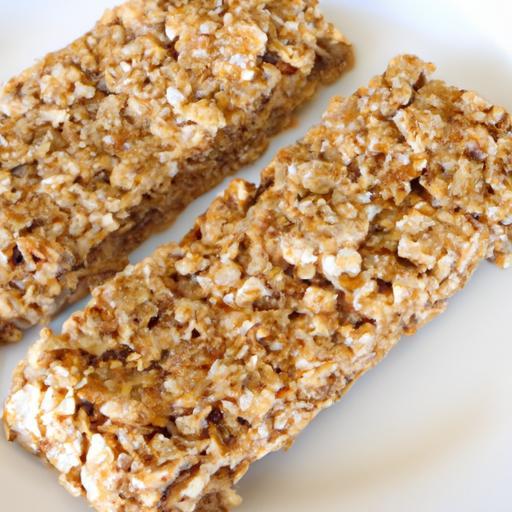
- Slice: use the parchment paper to lift the granola slab from the dish. On a clean cutting board, slice into 8 even bars using a sharp knife. Store bars in an airtight container.
Tips for Customizing Flavors and Textures
- Swap the nuts: Try pecans, pistachios, or hazelnuts for varied crunch and flavor profiles.
- Sweeten differently: Use maple syrup or agave nectar instead of honey for a vegan-friendly option.
- Add spice: A pinch of cinnamon or cardamom elevates the aroma dramatically.
- Incorporate superfoods: Stir in cacao nibs, shredded coconut, or spirulina powder for a healthful twist.
- Texture tweaks: For softer bars, increase almond butter by a tablespoon; for crunchier bars, add extra nuts/seeds.
Storing and Enjoying Your Homemade granola Bars for Maximum Freshness
wrap each bar individually in parchment paper or beeswax wraps to maintain texture and flavor. Store in an airtight container at room temperature for up to 5 days, or refrigerate to extend freshness up to 2 weeks. They also freeze beautifully-just place bars in a zip-top bag and freeze for up to 3 months. Let thaw slightly before enjoying.
Serving Suggestions
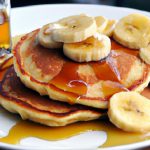
- Enjoy as a quick breakfast paired with a creamy Greek yogurt and fresh berries.
- Pair with a warm cup of herbal tea or coffee for a satisfying afternoon treat.
- Break into smaller pieces as a topping on smoothie bowls or salads for an added crunch.
- Garnish bars with a drizzle of dark chocolate or a sprinkle of toasted coconut for an indulgent finish.

| Nutrient | Per Bar (approx.) |
|---|---|
| Calories | 210 kcal |
| Protein | 6 g |
| Carbohydrates | 24 g |
| Fat | 10 g |
For more wholesome snack ideas, check out our Healthy Energy Balls recipe. To explore the benefits of natural sweeteners like honey and maple syrup, visit Harvard T.H. Chan School of Public Health.
Q&A
Q&A: Easy Homemade No-Bake Granola Bars – A Healthy Snack Idea
Q1: what makes no-bake granola bars a great snack choice?
A1: No-bake granola bars are quick to prepare, require minimal ingredients, and don’t heat up your kitchen. They’re a wholesome alternative to store-bought bars, allowing you to control the sugar and additives, making them both healthy and customizable.
Q2: What are the basic ingredients typically used in no-bake granola bars?
A2: The core ingredients usually include rolled oats, natural nut butter (like almond or peanut butter), a binding sweetener such as honey or maple syrup, and mix-ins like nuts, seeds, dried fruits, or dark chocolate chips. These combine to create a tasty and nutritious bite.Q3: How do no-bake granola bars stay together without baking?
A3: The combination of sticky nut butter and sweetener acts as a natural glue. When mixed thoroughly and chilled, the mixture solidifies, holding the bars firmly in shape without oven time.
Q4: Can I customize my granola bars to suit dietary restrictions?
A4: Absolutely! You can swap out ingredients to fit vegan, gluten-free, or nut-free diets. For example, use sunflower seed butter for nut allergies, gluten-free oats for gluten intolerance, and natural sweeteners like agave or brown rice syrup to keep them vegan-friendly.
Q5: How long do homemade no-bake granola bars keep?
A5: Stored in an airtight container in the refrigerator, they generally last up to two weeks. For longer storage, you can freeze them for up to three months-just thaw before enjoying.Q6: Are no-bake granola bars as nutritious as homemade baked versions?
A6: Yes! in fact, no-bake bars often retain more nutrients since there’s no heat degradation of ingredients like nuts and seeds. Plus, the ease of preparation encourages healthier snacking habits.
Q7: What are some creative add-ins to elevate my granola bars?
A7: Try shredded coconut, chia seeds, cacao nibs, dried blueberries, or even a sprinkle of cinnamon. These extras add texture, flavor, and an extra boost of nutrition.
Q8: Is this snack suitable for kids and on-the-go lifestyles?
A8: Definitely. The bars are perfectly portioned, mess-free, and energy-packed-ideal for lunchboxes, post-workout fuel, or a convenient mid-afternoon pick-me-up.
Q9: Do no-bake granola bars require special tools or equipment?
A9: Not at all. A mixing bowl, a spatula, and a pan or tray lined with parchment paper are all you need. Plus, no oven means less fuss and more snack time!
Q10: What’s the simplest way to start making my own no-bake granola bars?
A10: Begin by mixing one cup of oats, half a cup of nut butter, and a third cup of honey or maple syrup.Stir in your favorite add-ins, press firmly into a lined pan, chill for an hour, then slice and enjoy!
Future Outlook
Whipping up these easy homemade no-bake granola bars proves that wholesome snacking doesn’t have to be intricate. With just a handful of simple ingredients and no oven required, you can enjoy a nutritious treat anytime, anywhere. Whether you’re fueling up before a workout, packing a lunchbox, or just need a quick bite on the go, these bars strike the perfect balance between convenience and health. So next time hunger strikes, skip the store-bought options and reach for a batch of your own-as good snacks don’t have to be hard to make.