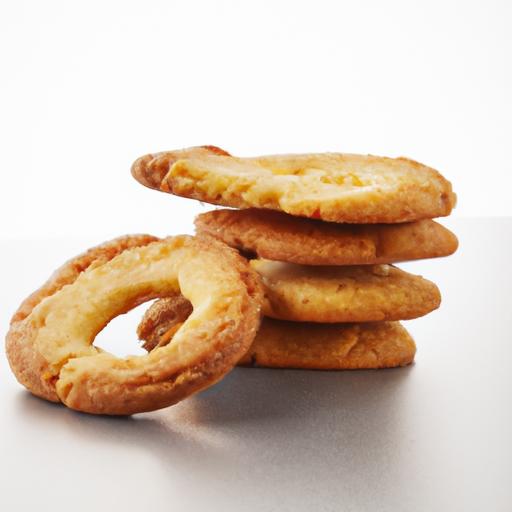

In the world of delicate confections, few treats capture the balance of elegance and simplicity quite like the tuile cookie. With its paper-thin crispness and gently curved silhouette, the tuile is a timeless classic that offers both visual charm and a delightful crunch. Whether adorning a plated dessert or enjoyed on its own, this versatile cookie has earned its place in kitchens and patisseries around the globe. In this ultimate guide, we’ll explore the art and science behind crafting the perfect tuile-crisp, golden, and irresistibly graceful-arming you with everything you need to master this subtle yet stunning delicacy.
Crisp and classic tuile cookies are a sublime blend of delicate texture and refined technique, a timeless treat that elevates any dessert plate. Originating from French patisserie, these wafer-thin cookies captivate with their perfect balance of crunch and subtle sweetness. Bringing a touch of elegance and culinary craftsmanship to your kitchen, mastering the art of tuiles allows you to create a versatile delicacy that pairs beautifully with ice cream, mousse, or simply enjoyed on their own.
Prep and Cook Time
Planning: 10 minutes
Cooking: 5 minutes per batch
Total Time: 15-20 minutes
Yield
Approximately 25 delicate tuiles, depending on size
Difficulty Level
Medium – Requires attention to timing and spreading for perfect crispness
Essential Ingredients for Achieving the Perfect Crisp
- 1/2 cup (60g) all-purpose flour, sifted – ensures a smooth, even batter
- 1/2 cup (100g) granulated sugar – provides sweetness and caramelized color
- 2 large egg whites, room temperature – the foundation of the light, crisp texture
- 1/4 cup (56g) unsalted butter, melted and cooled – enriches flavor and aids crispness
- 1 teaspoon vanilla extract – classic aroma
- Pinch of salt – balances sweetness and enhances other flavors
Step-by-Step Baking Guide for Consistently Thin and Golden Tuiles
- Preheat your oven to 350°F (175°C). Line a baking sheet with parchment paper or a silicone baking mat for effortless release.
- Whisk together the sugar, sifted flour, and salt in a medium bowl until well combined.
- In a separate bowl,lightly beat the egg whites until just frothy; no need to create stiff peaks – this helps maintain a smooth batter.
- Gradually fold the egg whites into the dry ingredients with a spatula, then gently fold in the cooled melted butter and vanilla extract. Stir until smooth but try not to overmix-this keeps your tuiles tender.
- Spoon a tablespoon of batter onto the baking sheet and quickly spread it with the back of a spoon or an offset spatula into a thin circle, about 3 inches in diameter. The batter must be very thin to ensure crispiness.
- Bake for 5-7 minutes, or until edges turn a delicate golden brown. oven times vary,so watch carefully to avoid burning.
- Remove the cookies from the oven and immediately transfer them to a rolling pin, bottle, or cooled utensil if you want a curved shape; if left flat, they will harden into crisp, lace-like discs.
- Allow to cool fully on a wire rack before storing them in an airtight container to preserve their crisp texture.
Creative Variations and Serving Suggestions to Elevate Your Tuile Experience
Try infusing your tuile batter with finely grated citrus zest (orange or lemon) or a teaspoon of ground cinnamon for inviting aromatic notes. For a modern twist, sprinkle finely chopped toasted almonds or matcha powder on top just before baking to add subtle crunch and flavor complexity.
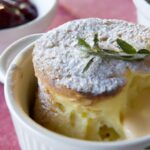
Serve tuiles as an elegant garnish nestled alongside a scoop of vanilla bean ice cream or layered against a dollop of luscious chocolate mousse. Their crispness adds a delightful contrast to creamy desserts, and their slender shape lends itself beautifully to being rolled into cones for edible vessels of sorbets or whipped cream.
Tips for Success: Mastering Crisp and Classic Tuile Cookies with Ease
- Spread batter very thinly: Thickness is key; a thicker spread yields softer, chewier cookies.
- Work quickly: Batter dries as it sits, making it challenging to spread evenly.
- rotate pans if needed: For even baking, switch baking sheets front to back halfway thru if your oven has hot spots.
- Shape while warm: Tuiles become brittle when fully cooled, so curve or shape them immediately out of the oven.
- Make-ahead: Store in an airtight container at room temperature for up to 5 days; re-crisp lightly in a warm oven if needed.
Serving Ideas
- Pair with seasonal berries and a dollop of mascarpone cream for a delicate dessert.
- Create a tuile “sandwich” by sandwiching two cookies with lemon curd or chocolate ganache.
- Use as an elegant garnish on plated soufflés or panna cottas.
- Serve alongside coffee or tea for an afternoon indulgence.
| Nutritional info (per 1 tuile) | Calories | Protein (g) | Carbs (g) | Fat (g) |
|---|---|---|---|---|
| 45 | 1 | 6 | 2.5 |
Explore more classic French desserts to complement your tuile creations, or deepen your baking finesse with Serious Eats’ expert technique guide.

Q&A
Q&A: Crisp and Classic – The Ultimate Tuile Cookie Recipe Guide
Q1: What exactly is a tuile cookie?
A1: A tuile is a delicate, thin, and crisp French cookie that’s typically curved or shaped while still warm. Its name means “tile” in French, inspired by its resemblance to the curved roof tiles found in Provence. Light and buttery,tuiles add a sophisticated crunch to desserts.
Q2: What ingredients are essential for making traditional tuile cookies?
A2: The classic tuile recipe calls for simple ingredients: butter,powdered sugar,all-purpose flour,egg whites,and a pinch of vanilla or almond extract for flavor. These components combine to create a batter that bakes into a wafer-thin, crisp cookie.
Q3: How do I achieve the perfect thin and crispy texture?
A3: The key lies in spreading the batter very thinly on the baking sheet and keeping a close eye during baking.Bake at a moderate temperature (around 350°F or 175°C), and once edges turn golden, quickly remove the cookies. Properly sized thinness and precise baking time create that signature crispness.
Q4: Can I shape tuiles while they’re hot?
A4: Absolutely! Tuiles are incredibly pliable when warm and can be molded over a rolling pin, a bottle, or shaped into curves or fans. Work quickly, as they harden within seconds of cooling, preserving the shape and adding visual elegance to your desserts.
Q5: What are some popular variations or flavor additions?
A5: While traditional tuiles stick to vanilla or almond notes, you can get creative by adding citrus zest (lemon, orange), finely chopped nuts, or cocoa powder for a chocolate twist. Some recipes incorporate spices like cinnamon to add warmth and depth.
Q6: Can tuile cookies be made ahead of time?
A6: Yes! Tuile cookies store well in an airtight container at room temperature for up to a week. Though, avoid humid environments as moisture can soften them. For best presentation, shape them only when needed to retain their crisp form.
Q7: What desserts pair best with tuile cookies?
A7: Tuiles make lovely garnishes for ice cream, mousses, panna cottas, and fresh fruit salads. Their light crunch contrasts wonderfully with creamy or soft textures, elevating the dessert experience with elegance and crunch.
Q8: Are tuiles difficult to make for beginners?
A8: While tuiles require attention to detail, they’re quite approachable. With practice in spreading batter thinly and perfecting timing, even novice bakers can master these crisp delights. The real challenge is resisting eating them all before serving!
Future Outlook
With their delicate crunch and elegant curves, tuiles transform even the simplest dessert into a work of art. This ultimate tuile cookie recipe guide has walked you through the steps to achieve that perfect balance of crispness and classic flavor. Whether you garnish your favorite ice cream or add a refined touch to a plated dessert, these tuiles offer a timeless way to delight the senses. Now, armed with technique and inspiration, it’s time to bring these delicate cookies to life in your own kitchen-one crisp bite at a time.