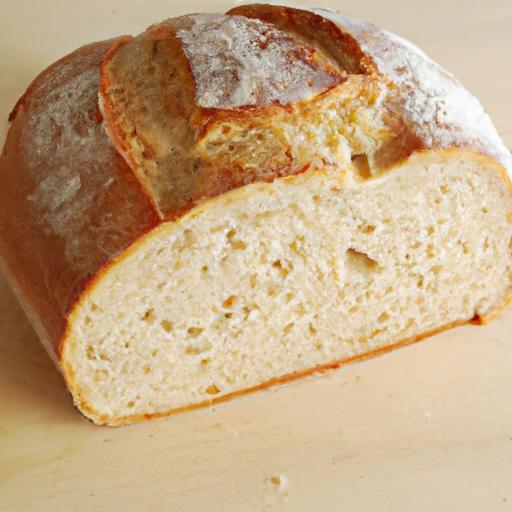
In a world filled with quick fixes and instant gratification, there’s something uniquely satisfying about the simple act of baking bread from scratch. Whole wheat bread, often celebrated for its hearty texture and nutritional benefits, can sometimes carry the reputation of being dense or dry. Yet,when made thoughtfully at home,it transforms into a soft,fluffy delight that nurtures both body and soul. This article explores the art of crafting wholesome homemade whole wheat bread-a comforting staple that invites warmth into your kitchen and goodness onto your table.
Wholesome homemade whole wheat bread truly transforms everyday baking into an art of comfort and nourishment. Selecting the finest whole wheat flour sets the foundation for that cherished soft, fluffy loaf – a texture that makes every bite a delight. This natural ingredient’s quality directly impacts the crumb’s lightness and the bread’s overall flavor profile, making it essential to choose a flour that balances coarse bran with tender wheat germ.
Choosing the Finest Whole Wheat Flour for Perfect Texture
Begin by seeking 100% whole wheat flour that is freshly milled for maximum freshness and flavor. Stone-ground flour often retains more nutrients and imparts a nuttier, richer taste than its commercial counterparts. You’ll want to avoid overly coarse flour, as the larger bran pieces can compromise the softness of your bread. Instead, look for finely sifted whole wheat flour or even try blending it with a small portion of bread flour to achieve an ideal balance between structure and tenderness.
Another valuable tip is to gently toast the whole wheat flour before mixing. This subtle step enhances the natural nuttiness without sacrificing moisture, elevating the aroma and depth of your final loaf.
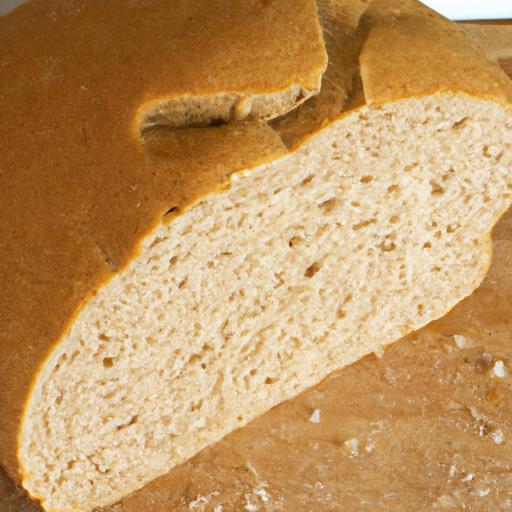
Secrets to Achieving Softness and Fluffiness in Whole Wheat Bread
Whole wheat bread can often feel dense if not handled properly, but the secret to softness lies in hydration and fermentation.Whole wheat flour absorbs more water than white flour, so be generous with your liquids to create a supple dough. Adding a tablespoon or two of vital wheat gluten can enhance the dough’s elasticity, helping it trap gases better during rising.
Moreover, incorporating natural tenderizers-like a dollop of plain yogurt, mashed ripe banana, or a spoonful of honey-can introduce subtle moisture and sweetness, enriching both texture and taste. Allow the dough to rise in a warm, draft-free environment to let natural yeasts work their magic, forming those coveted airy pockets.
The Importance of Proper Kneading and Rising Techniques
Kneading isn’t merely mixing; it’s the process that develops that essential gluten network which holds air and forms the bread’s structure. Use a gentle yet firm rhythm when folding and pressing the dough, aiming for a smooth, elastic surface. Over-kneading can create a too-firm crumb,while under-kneading leaves your bread crumbly and dense.
For the rising phase, patience is key. Allow the dough to double in size during the first proof, and after shaping, let it rise again until it’s nearly doubled before baking. To test readiness, gently press your finger into the dough-if the indentation quickly bounces back, it’s ready for the oven.
Tips for Enhancing Flavor with Natural Ingredients and Add-ins
Infuse your wholesome homemade whole wheat bread with delightful nuances by incorporating wholesome natural ingredients. Toasted seeds like sunflower, flax, or sesame, swirled into the dough or sprinkled on top before baking, provide both texture and a toasty crunch. Herbs such as rosemary, thyme, or a hint of cinnamon add warm aromatic layers that play beautifully against the nutty wheat base.
For a subtle sweetness and an extra moist crumb, consider folding in finely chopped dried fruits like apricots or raisins. These wholesome add-ins can turn a simple loaf into an exciting flavor adventure, perfect for breakfast or afternoon tea.
Prep and cook Time
- Prep Time: 20 minutes
- First Rise: 1 to 1.5 hours
- Second Rise: 45 minutes to 1 hour
- Bake Time: 30 to 35 minutes
Yield
1 loaf (about 12 slices)
Difficulty Level
Medium – Perfect for enthusiastic home bakers looking to sharpen fundamental bread-making skills.
Ingredients
- 3 cups whole wheat flour, freshly sifted or stone-ground
- 1 cup warm water (110°F / 43°C)
- 2 tsp active dry yeast
- 1 tbsp honey or maple syrup
- 2 tbsp olive oil or melted butter
- 1 tsp salt
- Optional add-ins: 2 tbsp toasted seeds, ¼ cup chopped dried fruit, 1 tsp fresh herbs
Instructions
- Activate the yeast: In a small bowl, combine warm water and honey, sprinkle yeast over. Let it sit for 5-10 minutes until foamy.
- Mix dry ingredients: In a large bowl, whisk whole wheat flour and salt together. If using vital wheat gluten, add here.
- Combine wet and dry: Pour the yeast mixture and olive oil into the flour. Stir with a wooden spoon until a sticky dough forms.
- Knead the dough: Turn dough onto a lightly floured surface. Knead gently but firmly for 8-10 minutes until smooth and elastic. if dough sticks, sprinkle flour cautiously to avoid dryness.
- First rise: Place dough in a greased bowl, cover with a damp cloth, and let rise in a warm spot for 1 to 1.5 hours or until doubled.
- Add flavor: Punch down the dough gently, knead in any optional herbs, seeds, or dried fruit.
- Shape and second rise: Shape dough into a loaf and place it in a greased loaf pan. Cover and let rise again for 45 minutes to 1 hour until nearly doubled.
- Preheat oven to 375°F (190°C): Position rack in the center.
- Bake: Bake for 30-35 minutes until the crust is golden brown. Tap the bottom of the loaf-if it sounds hollow, it’s done.
- Cool: Remove from oven and let cool on a wire rack for at least 30 minutes before slicing. This step allows the crumb to set perfectly.
Tips for Success
- Use filtered water to avoid chlorine, which can inhibit yeast activity.
- Room temperature ingredients encourage even fermentation.
- If your dough feels too stiff, add up to 2 extra tablespoons of water in small increments.
- For a lighter crumb, fold dough gently rather than vigorous kneading.
- Try baking on a preheated baking stone for an artisanal crust.
- Make-ahead option: freeze the baked, cooled loaf wrapped tightly, then thaw at room temperature.
Serving Suggestions
Serve your wholesome homemade whole wheat bread fresh with a spread of creamy butter or a drizzle of raw honey for breakfast. layer it with ripe avocado and a sprinkle of toasted sesame seeds for a satisfying lunch. It also pairs wonderfully with hearty soups or roasted vegetable dishes. Garnish a bread basket with fresh herbs or a scattering of seeds on your sliced loaf for extra visual appeal.

| Nutrient | Per Slice (approx.) |
|---|---|
| Calories | 110 kcal |
| Protein | 4 g |
| Carbohydrates | 20 g |
| Fat | 1.5 g |
For further inspiration on homemade bread, explore our artisan bread recipes, and discover the science behind yeast over at the King Arthur Baking Guide.
Q&A
Q&A: wholesome Homemade Whole Wheat Bread - soft, Fluffy Delight
Q: What makes homemade whole wheat bread “wholesome” compared to store-bought options?
A: Homemade whole wheat bread is wholesome because it’s crafted from simple, natural ingredients-whole wheat flour, water, yeast, and a touch of sweetness-without the preservatives or additives often found in store-bought versions. This means you’re nourishing your body with pure, fiber-rich goodness straight from your own oven.
Q: How do you achieve a soft and fluffy texture in whole wheat bread, which is typically denser than white bread?
A: The secret lies in proper hydration, patience during kneading, and allowing the dough ample time to rise. Using vital wheat gluten or a blend of whole wheat and bread flour can also enhance softness. Additionally, incorporating ingredients like honey or milk can definitely help tenderize the crumb, resulting in that coveted fluffy delight.
Q: Is whole wheat bread as nutritious as people say?
A: Absolutely! Whole wheat bread contains more fiber, vitamins, and minerals than white bread because it uses the entire wheat kernel-the bran, germ, and endosperm. This makes it a heartier, more nutrient-dense choice that supports digestion and sustained energy release.
Q: Can beginners successfully bake homemade whole wheat bread,or is it too challenging?
A: Beginners can definitely succeed! While whole wheat dough requires a bit more care due to its density,clear recipes and some practice will have you baking fragrant,soft loaves in no time. Starting with a simple recipe and allowing yourself to learn the dough’s feel are key steps.
Q: How long does homemade whole wheat bread stay fresh, and what’s the best way to store it?
A: Fresh homemade whole wheat bread is best enjoyed within 2-3 days when stored in an airtight container at room temperature. To maintain softness, wrapping the bread in a clean kitchen towel before placing it inside the container can definitely help. for longer storage, slicing and freezing the loaf preserves freshness-just toast slices straight from the freezer.
Q: Can variations be made to the basic whole wheat bread recipe?
A: Definitely! Whole wheat bread is a versatile canvas. Add-ins like nuts,seeds,dried fruit,or herbs can introduce exciting flavors and textures. Swapping part of the flour for rye or spelt or incorporating ingredients like mashed bananas or pumpkin puree can also enrich flavor and moisture.
Q: Why is homemade whole wheat bread worth the effort?
A: Beyond its nutritional benefits, homemade whole wheat bread fills your kitchen with inviting aromas and offers a satisfying, tactile baking experience. Each loaf carries the care and creativity of its baker, making it a comforting, tasty reward that store-bought bread simply can’t match.
Wrapping Up
Baking your own whole wheat bread is more than just a recipe-it’s a comforting ritual that fills your home with warmth and the irresistible aroma of fresh bread.With each soft, fluffy loaf, you’re not only nourishing your body but also embracing the simple joys of homemade goodness. Whether it’s breakfast toast or a cozy sandwich, this wholesome bread invites you to savor every bite and celebrate the art of baking from scratch. So roll up your sleeves, gather your ingredients, and let your kitchen become a haven of delicious, heartfelt creations.